Caladium bicolor leaves always turn yellow? These reasons are often forgotten!
Advertisement
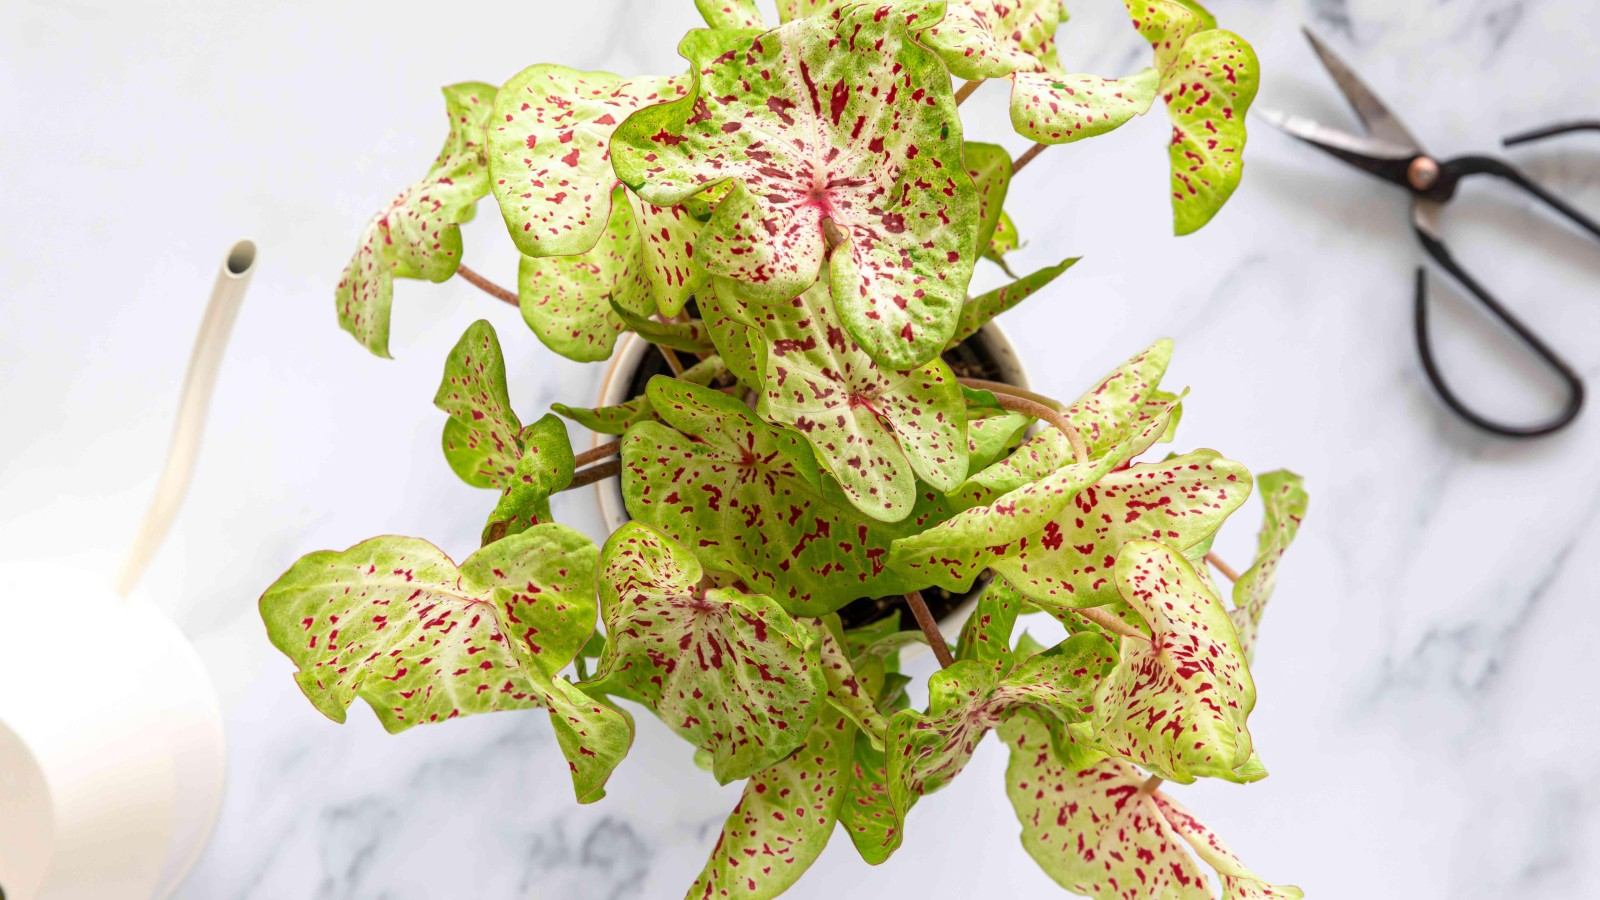
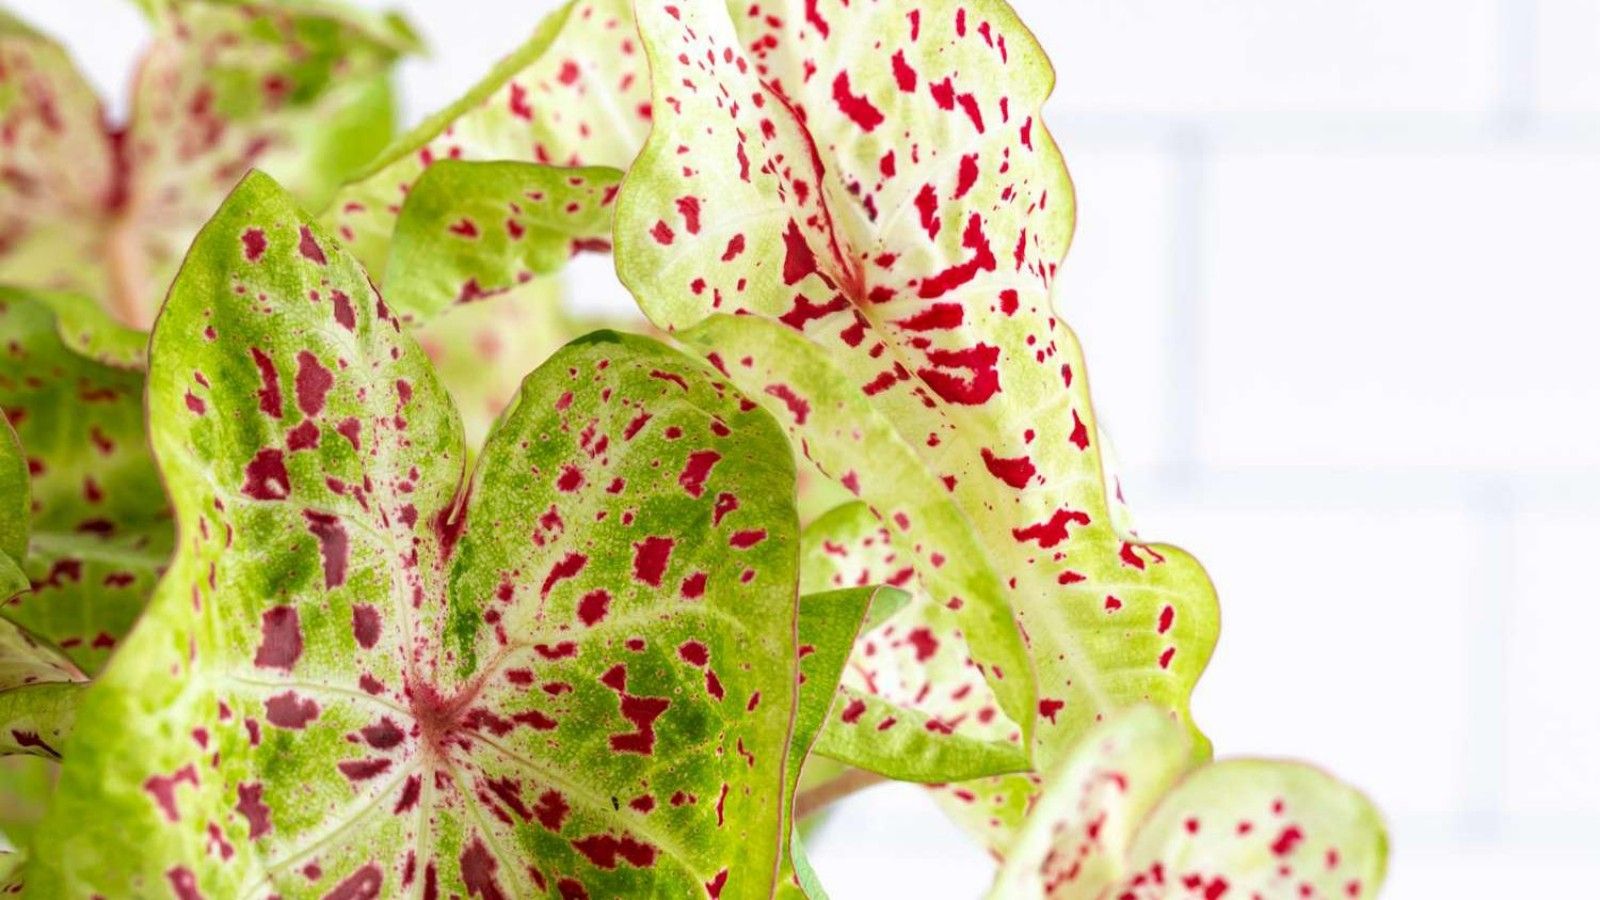
When you first see Caladium bicolor, you will be shocked by its gorgeous leaves that look like an overturned palette. This plant, also known as Caladium bicolor, belongs to the genus Caladium bicolor of the Araceae family and is native to the tropical rainforests of South America. Its leaves are uniquely shaped, arrow-shaped or heart-shaped, and the leaves are rich and varied in color. The colors of red, white, pink, green and other colors are intertwined to form various beautiful patterns, as if they were works of art painted by nature. Therefore, it is also affectionately called "angel wings" by people. With its high appearance, Caladium bicolor occupies an important position in the indoor ornamental plant world around the world. Whether it is placed in the corner of the living room or decorated on the windowsill of the study, it can instantly enhance the artistic atmosphere of the space. However, many caregivers often encounter a headache during the cultivation process-yellow leaves. To solve this problem, we first need to have a deep understanding of its growth conditions.
Caladium bicolor's growing conditions
Temperature requirements
Caladium bicolor is extremely sensitive to temperature, prefers a warm and humid environment, and is not cold-resistant. The most suitable temperature for its growth is between 20℃ - 30℃. When the temperature is below 15℃, the plant growth will become slow and the growth of the leaves will be inhibited; if the temperature continues to drop below 10℃, Caladium bicolor will enter a dormant state, at which time its growth basically stagnates and the leaves gradually wither; and when the temperature is below 5℃, the plant is likely to suffer frost damage, the roots and leaves will be seriously damaged, and even the whole plant will die. In winter, under indoor heating conditions, be careful to avoid placing Caladium bicolor near the air outlet of the air conditioner or the radiator to prevent the local temperature from being too high and burning the plant; in areas without heating, warming measures need to be taken, such as using a heat preservation cover or moving it to a warm corner of the room.
Light requirements
Although Caladium bicolor is native to tropical rainforests, it does not require strong direct sunlight. In the natural environment, it grows in the shade of tall trees and receives soft diffuse light. Therefore, when caring for it at home, it is best to place it in a place with bright diffuse light, such as near a window but away from direct sunlight. If it is in an environment with insufficient light for a long time, the leaves of Caladium bicolor will become pale and weak, the markings will gradually fade, and the plant will grow thin and weak; on the contrary, if it is exposed to strong direct sunlight, the leaves are easily burned, and they will turn yellow and scorch. In the summer when the sun is strong, you can use a sunshade net for shade, and the shade degree should be controlled at about 50% - 70%, which can ensure that the plant receives enough light for photosynthesis and avoid sunburn.
Soil conditions
Caladium bicolor likes loose, fertile, well-drained acidic soil. Generally speaking, the pH value of the soil is more suitable between 5.5 - 6.5. You can use leaf humus, peat soil, and perlite in a ratio of 3:2:1 to prepare the culture soil. This soil is not only rich in humus, which can provide sufficient nutrients for the plants, but also has good air permeability and drainage, which can effectively prevent water accumulation and root rot. In addition, before planting, you can add an appropriate amount of decomposed organic fertilizer to the bottom of the pot as base fertilizer, such as decomposed cake fertilizer or chicken manure fertilizer, to provide long-term nutrient support for plant growth.
Water management
Because Caladium bicolor is native to humid tropical rainforests, it has a large demand for water, but is not resistant to waterlogging. During the vigorous growth period (spring and summer), the soil needs to be kept moist, but water should not accumulate in the pot. Generally speaking, water 2-3 times a week, and the specific frequency should be adjusted according to weather conditions and the dryness and wetness of the pot soil. When the surface of the pot soil is found to be dry, water it until water seeps out from the bottom of the pot. In autumn, as the temperature gradually drops, the plant growth rate slows down, and the frequency of watering should be reduced accordingly, watering can be done every 5-7 days; in winter, the plant enters a dormant period and has very little demand for water. At this time, watering should be controlled to keep the potting soil slightly dry, and watering should be done about once a month. In addition to soil watering, Caladium bicolor also likes higher air humidity. In dry seasons, such as when the indoor heating is turned on in winter or when the temperature is high in summer, you can spray water around the plant to increase the air humidity, but be careful to avoid water droplets remaining on the leaves for a long time to avoid causing diseases.
Causes and solutions for yellowing leaves of Caladium bicolor
1. Improper watering
Analysis of the core causes
Excessive watering (waterlogging) Caladium bicolor has fleshy fibrous roots that like moisture but avoid waterlogging. When water is applied too much at a time or the drainage holes at the bottom of the pot are blocked, water will remain around the roots for more than 48 hours, and the soil oxygen content will drop sharply to below 15%. The root cells will produce alcohol poisoning due to anaerobic respiration, causing the absorbing root cortex to rot. At this time, the leaves appear to be dark yellow and discolored as a whole, with water-soaked transparent patches between the veins. The base of the petiole feels soft and rotten when touched, and the whole plant will fall over in severe cases.
Insufficient water supply (drought damage) Long-term water shortage will cause physiological drought in the plant, especially during the high temperature period in summer when the transpiration rate reaches 0.8-1.2g/(h・cm²). When the soil moisture content is lower than 60% of the field water holding capacity, the guard cells of the leaves lose water and close, and photosynthesis stagnates. The initial symptoms are small scorched spots on the leaf tips. Within 2-3 days, a yellowing band forms along the leaf margins. Old leaves fall off before new leaves. The roots turn brown and the root tips dry up.
Scientific rescue plan
Treatment of waterlogging: Remove the pot immediately, rinse the roots with clean water 3 times to remove silt, trim the rotten roots (apply plant ash to the cut ends), and soak in 1000 times carbendazim solution for 20 minutes. Use a ceramic pot with a diameter 2cm larger than the original pot, and use a mixed formula of leaf humus: perlite: coarse sand = 4:3:3 as the substrate. Spray water on the leaves twice a day during the seedling period after potting, and resume normal watering after 10 days.
Drought remedy: First spray water on the leaves to relieve transpiration, and use the "immersion pot method" to replenish water after 1 hour - put the flower pot in a tray filled with 1/3 clean water, let the water slowly penetrate from the bottom hole to the surface of the pot soil to moisten it, repeat 2 times to ensure thorough watering, and then keep the surface of the pot soil 1cm dry when watering.
2. Imbalanced fertilization
Deficiency chlorosis
Nitrogen deficiency: New leaves grow slowly, leaf width shrinks by more than 30%, leaf color changes from emerald green to light green, old leaves begin to yellow from the leaf edge and extend to the leaf center, and petioles are thin and easy to bend.
Potassium deficiency: Yellow-brown necrotic spots appear on the leaf edge, with a diameter of about 2-3mm. As potassium deficiency worsens, the spots connect to form irregular withered edges, the leaves are hard and brittle and easy to break, and the root system is blocked from developing, resulting in a decrease in absorption capacity.
Fertilizer damage When the soil EC value exceeds 1.5mS/cm, the root cells undergo plasmolysis and the epidermal cells at the root tip necrotize. The leaves show white or brown burn spots between the veins, with dark brown thin edges at the edge of the spots. In severe cases, the entire leaf curls and scorches. In the early morning, transparent crystalline substances (salt precipitation) can be seen secreted from the leaf tip.
Precision fertilization strategy
Supplementation for fertilizer deficiency: During the growing season (April-September), apply water-soluble fertilizer with a nitrogen, phosphorus and potassium ratio of 2:1:2 every 15 days, and control the concentration to 1500 times liquid (i.e. 1g fertilizer to 1.5L water). Apply in the evening to avoid leaf burns. Supplement 0.2% magnesium sulfate solution once a month in combination with watering to prevent magnesium deficiency and yellowing.
First aid for fertilizer damage: Immediately irrigate the roots with clean water for 3 consecutive times, with the amount of water each time being 2 times the volume of the potting soil, to promote the discharge of fertilizer with water. If the potting soil is severely salinized (white precipitates on the surface), replace 1/2 of the old soil, add 5% decomposed sheep manure to the new soil for improvement, and suspend fertilization for 20 days during the seedling acclimatization period.
3. Improper light regulation
Mechanism of light environment impact
Strong light stress: Direct light exceeding 20,000 lux is continuously irradiated for more than 4 hours, which destroys the chloroplast structure of the leaves and causes lipid peroxidation of the thylakoid membrane, resulting in a decrease in the chlorophyll a/b ratio. In the early stage, needle-shaped brown spots appear on the back of the leaves. After 2-3 days, circular burn spots form on the front of the leaves. The center of the spots is grayish white and the edges are dark brown. In severe cases, the whole leaf is scorched.
Low light disorder: When the plant is in a low light environment below 500 lux for a long time, the plant will grow too long, the petiole will elongate by more than 20%, the leaves will become thinner and the light transmittance will increase by 30%, the leaf color will turn pale yellow-green, the speed of new leaf expansion will be delayed by 5-7 days, and the insufficient accumulation of photosynthetic products will cause the old leaves to turn yellow and fall off.
Key points of light management
Summer protection: Use 50%-70% sunshade nets to shade from May to September, ensure 4-6 hours of scattered light every day (such as behind the window curtain), and avoid direct sunlight from 10 noon to 4 pm. If burned leaves are found, cut them off in time, apply healing agent to the wounds, and spray water around the plants to cool down and increase humidity.
Supplementary lighting in winter: When the light intensity is less than 1000lux, configure a 100w full-spectrum LED supplementary light per square meter, supplement light for 8-10 hours a day, and keep the light 50-60cm away from the plant to avoid damage from strong light at close range.
4. Temperature stress
Extreme temperature hazards
The critical low temperature for low temperature chilling damage is 12℃. When the temperature is below 15℃ for 24 hours, the freezing rate of root cell sap reaches 10%, resulting in interruption of water absorption. The leaves show water-soaked dark spots, the surface of the spots is smooth and without mold layer. When the temperature drops sharply at night, the expansion speed of the spots accelerates, and abscission occurs at the base of the petiole. A large number of leaves fall off within 1-2 weeks.
When the high temperature heat damage exceeds 32℃, the plant enters a semi-dormant state, the transpiration rate exceeds the water absorption rate, and the relative water content of the leaves drops below 80%. In the early stage, the leaf margins are slightly curled, and light brown scorch spots appear on the leaf tips. As the high temperature continues, the leaves turn yellow and curl as a whole, and red or purple spots appear on both sides of the main veins on the back of the leaves, and the growth points stop differentiating.
Temperature control technology solution
Winter insulation: When the room temperature is below 18℃, cover the plant with a double-layer plastic film (leave air holes), or place a heating pad at the bottom of the flowerpot (set the temperature to 20-22℃). Stay at least 1m away from windows at night to avoid cold winds, and keep the minimum temperature no lower than 15℃.
Cooling in summer: Use air conditioning or water curtains to control the ambient temperature at 25-30℃, sprinkle water on the ground at noon to increase evaporative heat dissipation, and turn on silent fans (wind speed ≤ 0.5m/s) to promote air circulation. Blade spraying should be done in the morning to avoid burns caused by high-temperature water droplets.
5. Insect and disease infestation
Pest characteristics
Red spider mites: gather on both sides of the main vein on the back of the leaf, sucking sap to cause the leaf to lose green color and form dense white spots. In severe cases, the back of the leaf is covered with gray-white spider silk, the leaves lose color and become brittle, and the photosynthesis efficiency of the affected leaves decreases by more than 40%.
Aphids: gather in the axils of new leaves, secrete honeydew to cause sooty mold, the affected new leaves curl and become deformed, the growth points shrink, and spread viral diseases at the same time, causing the leaves to become yellow and green.
Disease manifestations
Leaf spot disease: In the early stage, brown spots with a diameter of 1-2mm appear on the leaves, with yellow halos on the edges. After the spots expand, they become round or irregular, with gray-white centers and black spots (conidiophores). In severe cases, the spots connect into pieces, causing the leaves to turn yellow.
Anthracnose: The disease usually starts from the tip or edge of the leaf. The lesions are semicircular or V-shaped, dark brown to black, with yellow chlorotic bands on the edges. When it is humid, pink sticky substances (conidia) appear on the surface of the lesions, and the diseased leaves tend to fall early.
Comprehensive control measures
Pest control: For red spider mites, spray with a mixture of 1.8% avermectin emulsifiable concentrate 2000 times diluted + 1% spiroclofen suspension 1500 times diluted, focusing on the back of the leaves; for aphids, spray with 10% imidacloprid wettable powder 1500 times diluted, once every 5 days, for 3 times in a row, and pay attention to rotating the pesticides to avoid drug resistance.
Disease prevention and control: Spray 1:1:100 Bordeaux mixture once a month before the disease occurs; spray 25% azoxystrobin suspension 1500 times or 50% prochloraz manganese salt wettable powder 1000 times at the early stage of the disease, once every 7 days, spray 2-3 times in a row, and remove and destroy the diseased and damaged leaves in time to reduce the pathogen base.
6. Soil degradation
Signal of substrate deterioration
When the soil pH value deviates from the range of 5.5-6.5, or the EC value exceeds 1.2mS/cm, the root absorption function is blocked. The porosity of compacted soil is less than 30%, and the ventilation pores are less than 10%, resulting in anaerobic respiration of the root system. The intuitive manifestation is that the water infiltrates slowly after watering (more than 5 minutes without complete infiltration), the roots are brown when turning the pot, new roots are scarce, and the soil is lumpy and difficult to crush.
Soil improvement plan
Mild compaction: insert bamboo chopsticks into the potting soil (avoid the main root) with a depth of 5-8cm, and insert once every 3cm to form ventilation holes. Lay 2cm thick decomposed pine needles or crushed peanut shells on the surface, and mix 5% decomposed earthworm manure with loose soil every month to gradually improve the structure.
Severe compaction: Repot every spring. The new substrate is made of 4 parts leaf mold, 3 parts peat, 2 parts coarse coconut shells, and 1 part perlite. Add 5% decomposed chicken manure as base fertilizer. When repotting, trim 1/3 of the old roots and retain the heart soil. After planting, water thoroughly to establish roots and place in a place with scattered light for 15 days to slow down the growth of seedlings.
Maintenance summary: Build a four-dimensional maintenance system
Water management: Keep "dry and wet", water in the early morning in summer, replenish water at noon in winter, and maintain air humidity at 60%-80%
Nutrient supply: Apply thin fertilizer frequently during the growth period, balance nitrogen, phosphorus and potassium, and regularly supplement calcium, magnesium and medium elements
Light and temperature control: diffuse light environment (1000-15000lux), temperature 18-28℃, avoid day and night temperature difference exceeding 10℃
Substrate maintenance: repot and update the substrate every year, regularly test the soil pH/EC value, and keep it loose and breathable
By accurately identifying the specific symptoms of leaf yellowing, combining it with environmental factor screening and implementing targeted solutions, the health of the colorful caladium can be effectively restored, allowing its leaves to continue to present mottled and bright colors, making it a highlight of indoor foliage plants.
Advertisement
Learn More
-

- July 16,2026
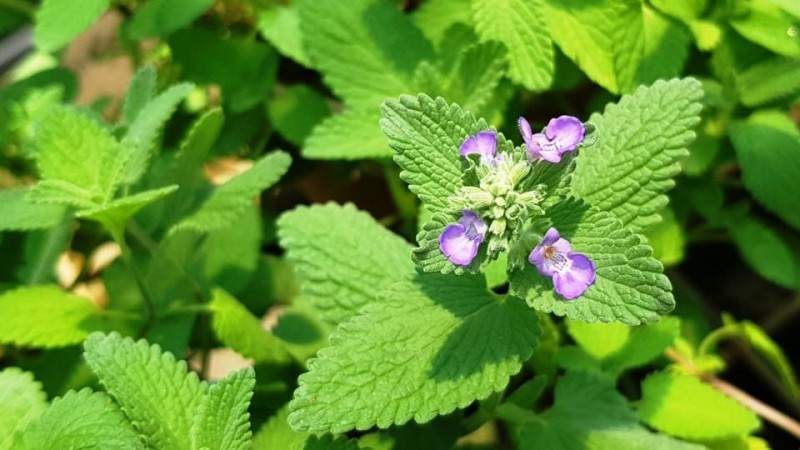
- Common Diseases & Pest-Related Disorders of Nepeta cataria: Full Identification, Organic Treatment and Long-Term Prevention Guide
-
- July 7,2026
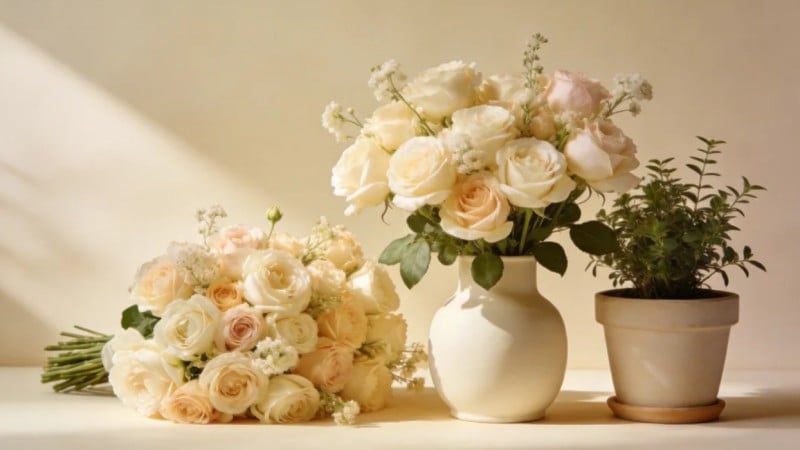
- Potted Plants or Cut Flowers for Holidays? A Comparison of Aromatic Plant Gift Options
-
- July 2,2026
- Detailed Planting Steps for Quercus palustris in a Home Garden!
-
- June 24,2026
- Conveying Sentiments Through Floral Fragrance: The Cultural Significance of Gifting Flowers on International Holidays
-
- June 15,2026
- Why are the leaves of Prunus laurocerasus attacked by caterpillars?
-
- June 9,2026
- Fresh Flowers Bring Vitality, Dried Flowers Offer Delight: A Guide to Choosing High-Quality, Fragrant Plants for Long-Term Enjoyment

Advertisement
 Poisonous and danger
 Edible and medicinal
 Wild and common weed