
Common Diseases & Pest-Related Disorders of Nepeta cataria: Full Identification, Organic Treatment and Long-Term Prevention Guide
Advertisement
Many new gardeners assume Nepeta cataria, commonly known as catnip, is virtually disease-proof. This hardy mint-family herb tolerates drought, poor soil and temperature swings, yet it regularly falls victim to fungal, bacterial and secondary pest-triggered illnesses when growing conditions shift out of its preferred range.
Catnip’s soft, fuzzy foliage traps moisture easily, and its dense bushy growth creates stagnant humid microclimates that pathogens thrive within. Even seasoned gardeners often misdiagnose leaf discoloration, wilting and spotted foliage, writing off symptoms as simple heat stress or nutrient deficiency instead of addressing infectious disease at its root.
What makes catnip disease management uniquely important is its dual purpose: gardeners harvest its leaves for calming herbal tea for humans and cat enrichment toys for domestic felines. Synthetic fungicides and harsh chemical insecticides leave toxic residue on edible and pet-safe foliage, making organic, low-toxicity control methods non-negotiable for anyone growing catnip for consumption or animal use.
This comprehensive guide breaks down every widespread disease of Nepeta cataria, covering clear symptom identification, environmental triggers, step-by-step organic treatment protocols, and long-term cultural prevention strategies to keep your catnip patch vigorous, aromatic, and free of persistent infections all growing season long.
Part 1: Powdery Mildew – The Most Prevalent Fungal Disease of Catnip
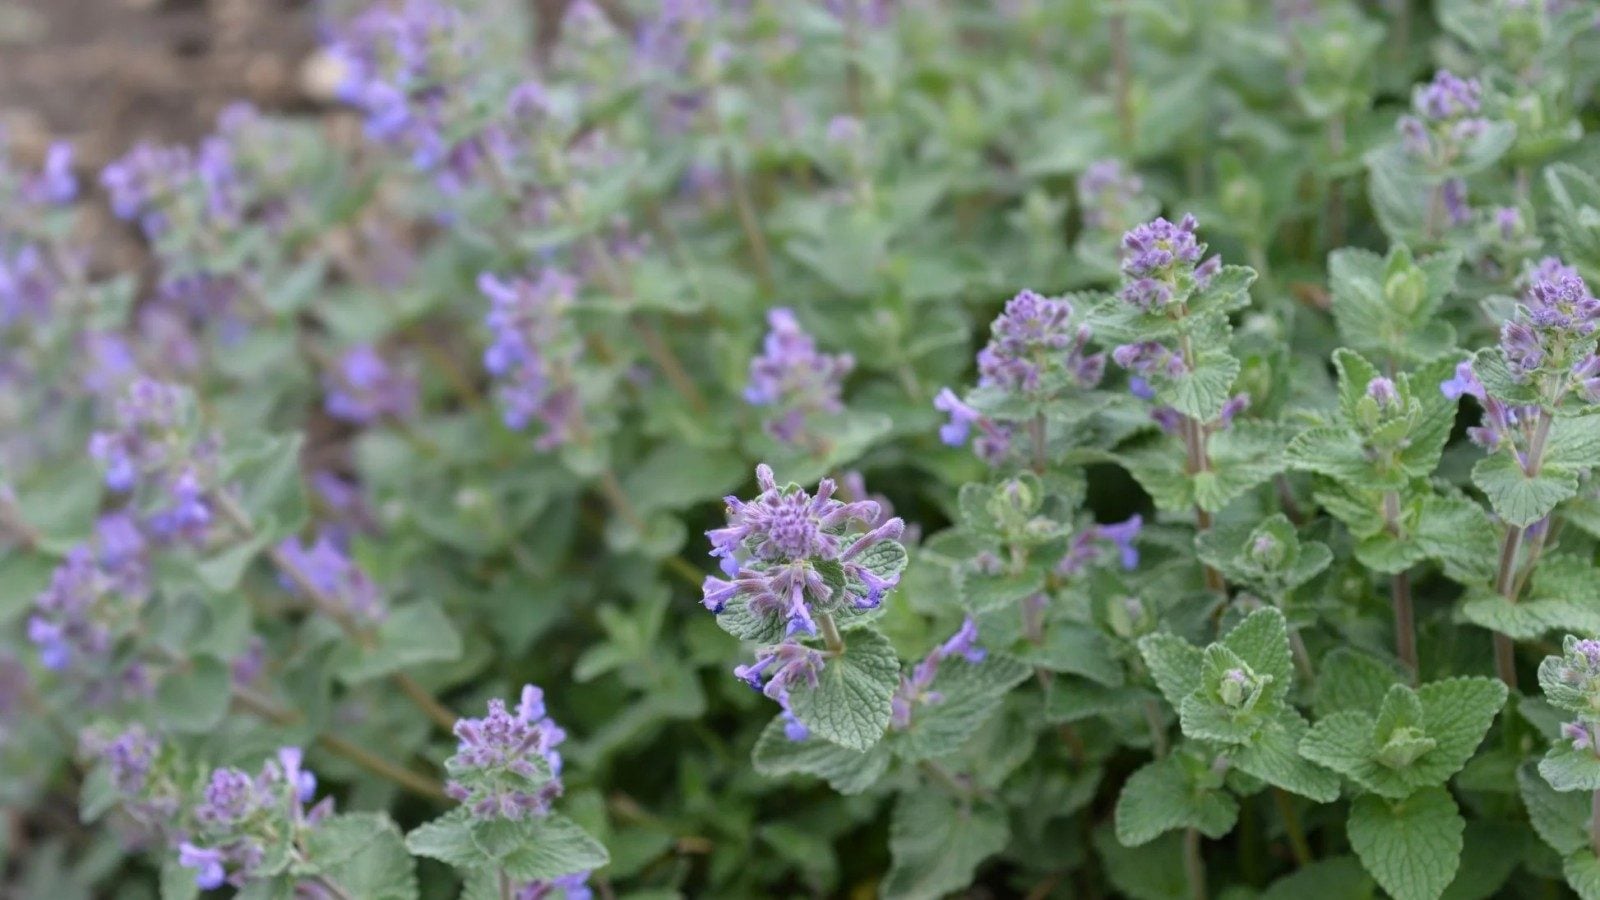
Powdery mildew is the number one disease affecting catnip across all USDA hardiness zones 3 through 9, appearing in late spring through early fall as overnight humidity rises while daytime temperatures stay mild between 15°C and 27°C.
Unlike most fungi that require standing water to germinate, powdery mildew spores spread rapidly through dry, stagnant air, making it deceptive for gardeners who think limited watering will prevent fungal outbreaks. Early signs start as tiny scattered white dust-like flecks on the undersides of lower mature leaves, expanding into thick chalky coatings that wipe off easily between your fingertips without leaving wet residue behind.
As infection advances, affected leaves turn pale yellow, curl inward along their edges, and drop prematurely from stems. New growth emerges stunted, twisted, and coated in mildew, drastically reducing the plant’s production of nepetalactone—the aromatic oil that gives catnip its appeal to cats and its medicinal value for human teas. Crowded plant spacing, overhead sprinkler watering, partial shade and overgrown inner foliage create the perfect breeding ground for this pathogen. Container-grown catnip suffers even worse from mildew, as enclosed pot walls restrict cross-airflow around the leaf canopy.
Organic treatment begins with immediate sanitation to stop spore spread. Prune all fully infected leaves and thin dense inner branches to open airflow through the bush; bag and discard all diseased trimmings rather than composting them, as mildew spores survive decomposition. Three highly effective home sprays work for mild to moderate outbreaks: a baking soda blend (1 tbsp baking soda, half tsp mild castile soap, one gallon of water), whole milk diluted at a 1:9 ratio with water, or cold-pressed neem oil mixed with emulsifying soap. Coat both leaf surfaces thoroughly every seven days, applying in early morning so foliage dries fully before midday heat. For severe mildew pressure, potassium bicarbonate sprays deliver stronger antifungal activity without toxic chemical residues on harvestable leaves.
Long-term prevention eliminates the conditions mildew favors entirely. Space catnip transplants a minimum of 12 to 18 inches apart during planting to allow free air circulation between individual bushes. Always water directly at the base of stems using drip irrigation or hand watering cans, avoiding any spray that dampens leaf surfaces.
Trim catnip back by half after its first bloom flush to remove dense lower foliage, and position plants in full unobstructed sunlight for six to eight hours daily. Avoid over-applying high-nitrogen fertilizer, which creates soft, tender new growth far more susceptible to mildew colonization. If mildew returns yearly in your garden, rotate catnip to a new bed every two seasons and clear all fallen leaf debris from the soil surface each autumn to eliminate overwintering spores.
Part 2: Root Rot & Stem Base Rot – Deadly Soil-Borne Fungal Disorders
Root rot, triggered by Pythium, Phytophthora and Rhizoctonia soil fungi, is the second most destructive catnip disease and the leading cause of sudden plant collapse in home gardens. Unlike above-ground mildew, root rot develops hidden beneath the soil surface, meaning gardeners often miss early warning signs until irreversible damage has already taken hold. The core trigger is consistent soil saturation paired with compacted, poorly draining growing medium—catnip evolved in well-aerated loam and sandy ground and cannot survive prolonged standing water around its shallow, fibrous root system.
Early above-ground symptoms are easy to misinterpret as drought stress: lower leaves turn uniform pale yellow, stems wilt drastically even when soil feels damp to the touch, and new growth slows to a complete halt. When you gently tug the base of an infected plant, it pulls loose from the soil with minimal resistance, as feeder roots have turned mushy, brown and slimy. Healthy catnip roots are firm, pale white or light tan; rotted roots release a sharp, unpleasant moldy odor when exposed to air. In advanced cases, rot creeps upward into the stem base, creating dark sunken lesions that girdle the stalk and cut off all water and nutrient transport to the canopy.
Treatment for root rot depends on infection severity. For mild cases where only a small portion of roots show decay, carefully dig up the entire plant and shake away all contaminated soil. Use sterile sharp pruning shears to cut away every mushy, discolored root segment, leaving only firm, healthy white root tissue. Rinse remaining roots with clean room-temperature water, then set the plant in a shaded, dry area for 24 hours to let cut root surfaces callus over. Replant into fresh, amended soil mixed with coarse sand and aged pine compost to boost drainage, and pause all irrigation for one full week to let the new root zone dry completely. Severe infections with widespread root decay cannot be reversed; remove and destroy the entire plant to stop fungal spores from spreading through garden soil to adjacent herbs.
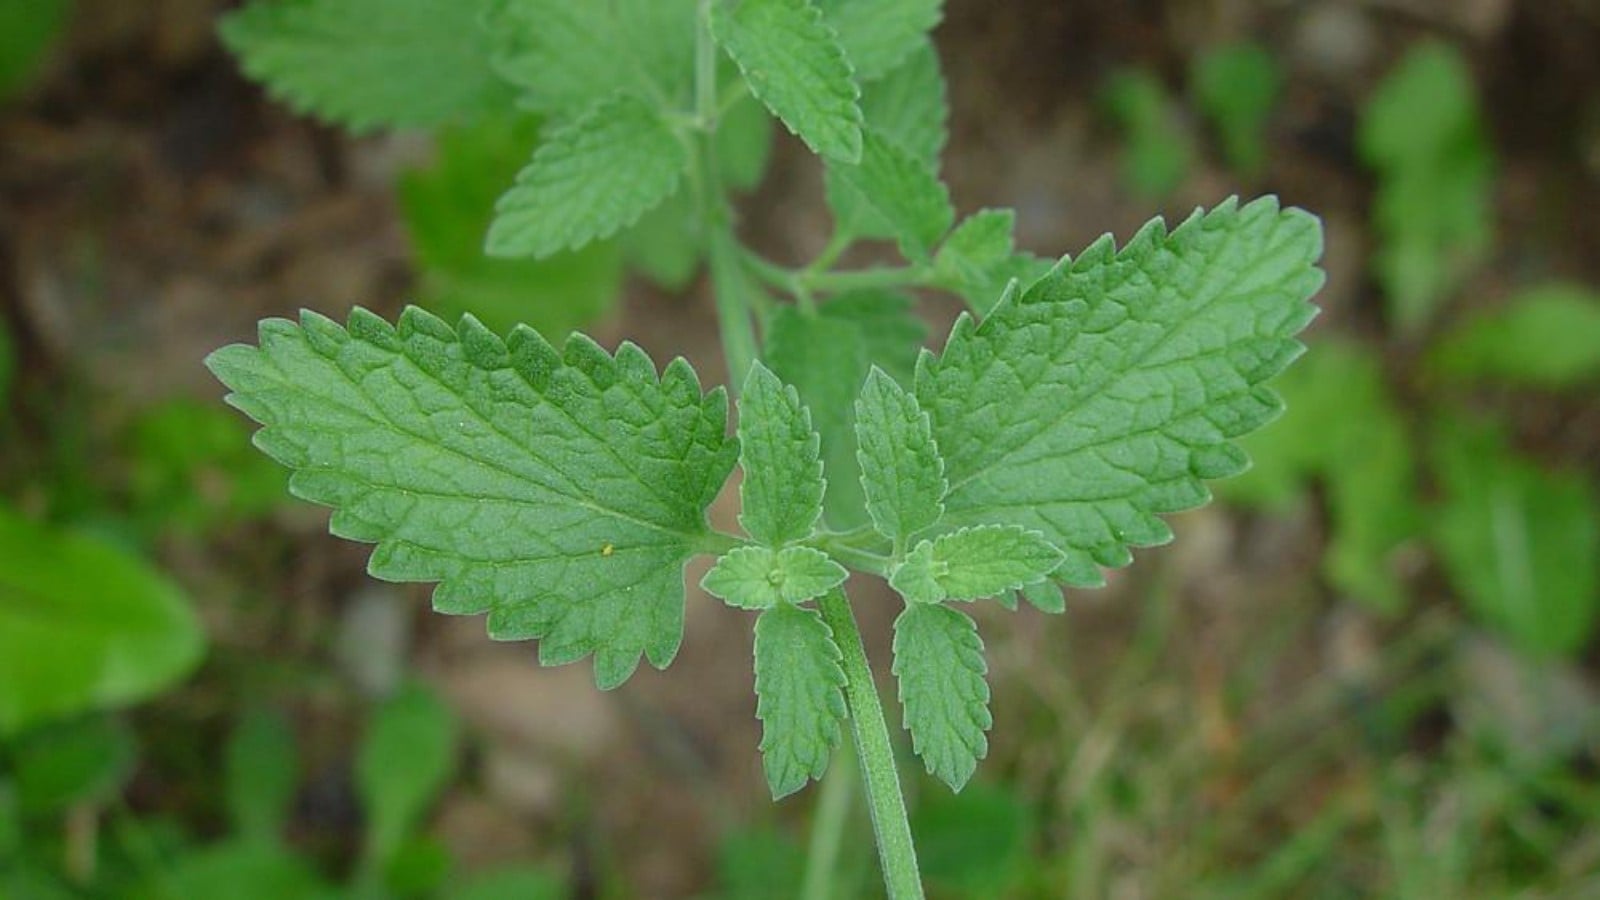
Preventative practices eliminate root rot risk from the moment of planting. Before placing catnip seedlings, test your garden soil texture and amend heavy clay with grit, perlite and organic compost to break up compaction. If growing catnip in pots, exclusively use containers with multiple large drainage holes and lightweight herb potting mix blended with sand. Stick to a strict watering schedule: only irrigate when the top one to two inches of soil dry out fully, and never allow rainwater to pool in low-lying depressions around the root zone. Avoid piling thick mulch directly against the catnip stem base, which traps moisture and invites stem rot pathogens. Each spring, loosen the top layer of soil around mature catnip clumps to improve underground airflow, and implement a three-year crop rotation cycle to reduce buildup of rot fungi within garden beds.
Part 3: Fungal & Bacterial Leaf Spot Complex
Leaf spot diseases cover a broad group of fungal and bacterial pathogens that create disfiguring, perforated foliage on Nepeta cataria, reducing photosynthesis and ruining leaves intended for harvest. Fungal leaf spot (Alternaria and Septoria species) and bacterial leaf spot present slightly different visual markers, though both spread rapidly during extended rainy weather, overhead watering, and crowded plant growth. Many gardeners confuse leaf spot damage with pest feeding marks, delaying treatment until most foliage becomes spotted and drops prematurely.
Fungal leaf spot first emerges as small tan or light brown circular blemishes on mature lower leaves, each surrounded by a distinct pale yellow halo. As spots expand, they develop dark concentric ring patterns at their center, and in humid weather, tiny fuzzy gray fungal growth appears on the spot surface. Bacterial leaf spot creates dark, water-soaked angular lesions that ooze thin clear sap when squeezed; infected leaf tissue quickly turns black and brittle, forming small holes as dead tissue falls away. Both pathogens overwinter on fallen leaf litter and splatter upward onto new growth during rain or irrigation splashback.
Organic intervention requires immediate removal of all spotted foliage, as infected leaves act as constant spore sources. Collect every damaged leaf from the plant and the surrounding soil surface, disposing of all debris off-site rather than composting. For fungal spot outbreaks, weekly neem oil sprays suppress spore germination and slow lesion expansion; bacterial spot responds best to diluted copper soap sprays applied every five days during damp weather. Always spray both leaf tops and undersides, and stop all overhead irrigation entirely to prevent water from transferring bacteria and fungi between leaves.
Consistent garden sanitation is the most reliable long-term defense against leaf spot complex. Rake up all fallen catnip leaves at the end of each growing season to eliminate pathogen overwintering sites. Maintain wide spacing between catnip and other mint-family herbs (mint, lemon balm, oregano), as these plants share identical leaf spot pathogens and cross-contaminate one another. When pruning catnip, disinfect cutting tools with rubbing alcohol between each bush to avoid manually transferring bacterial spores to healthy plants. Avoid overcrowding catnip with taller ornamental plants that block sunlight and trap humid air around the herb canopy. If leaf spot returns annually, apply a thin layer of straw mulch around the root zone in early spring to prevent rain splash from carrying soil-borne pathogens onto low leaves.
Part 4: Secondary Mold Disorders Triggered by Sap-Sucking Pests
While powdery mildew and root rot are primary diseases, catnip frequently develops secondary black sooty mold and cottony white mold as a side effect of aphid, spider mite, and mealybug infestations—often overlooked by gardeners who treat only the mold without addressing the underlying pest issue. Sap-feeding insects pierce leaf tissue to extract nutrients, excreting sticky sugar-rich honeydew that coats stems and foliage. This honeydew creates the perfect nutrient film for mold spores to attach and multiply, creating dark soot-like black coatings or fluffy white mold mats that block sunlight and inhibit leaf function.
Sooty black mold appears as flat, hard black smudges across leaves and stems; it does not penetrate plant tissue directly but blocks chlorophyll production, leading to gradual yellowing and leaf drop. Cottony white mold develops in cool, damp shaded areas of the bush, forming thick soft white fungal masses that produce tiny black resting sclerotia that survive for multiple years in garden soil. Pest activity is always visible alongside mold: aphids cluster on tender new growth, spider mites spin fine silk webbing between leaf nodes, and mealybugs leave cottony white wax masses tucked into stem crevices.
Treatment requires a two-step process: eliminate the sap-sucking pest population first, then target the residual mold growth. For light pest infestations, blast leaves with a strong jet of cold water to dislodge aphids and mites, then wipe mealybug clusters with cotton swabs dipped in 70% rubbing alcohol. For widespread infestations, spray the entire bush with diluted neem oil soap solution every three days until all insect activity ceases. Once honeydew production stops, remove heavily mold-coated leaves and spray remaining foliage with mild baking soda spray to dissolve and break down mold residue. Severe cottony white mold infections require complete removal of heavily damaged stems to stop sclerotia from dropping into the soil.
Prevent secondary mold by establishing balanced garden biodiversity to attract beneficial predatory insects that control pest populations naturally. Plant pollinator flowers like marigolds, cosmos and dill near catnip patches to draw ladybugs, lacewings and predatory mites that feed on aphids and spider mites without damaging catnip foliage. Inspect catnip weekly starting in early spring to catch tiny pest colonies before they multiply and produce honeydew. Avoid over-fertilizing catnip with high-nitrogen feeds, which produce soft new growth that attracts sap-sucking insects in droves. Prune dense inner growth to boost airflow and reduce surface humidity where mold spores can colonize honeydew deposits.
Part 5: Universal Integrated Disease Prevention Plan for Catnip
After identifying and treating active infections, adopting year-round integrated cultural practices drastically reduces future disease outbreaks and strengthens Nepeta cataria’s natural disease resistance. The foundation of disease-free catnip is growing conditions aligned with its native wild habitat: full sunlight, sharply draining neutral to slightly alkaline soil, moderate infrequent watering, and consistent air circulation through the leaf canopy.
Start with proper site selection before planting. Choose an open, unshaded lawn or herb bed with no overhead tree cover, positioned away from low-lying puddle zones and foundation runoff from concrete structures that raise soil pH to harmful alkaline levels. Test soil pH annually and amend overly acidic ground with small amounts of garden lime to maintain the ideal 6.6–7.5 pH range catnip requires to absorb nutrients and build robust immune function. Improve drainage in clay-heavy soil by mixing coarse sand and aged oak leaf compost into the planting hole at transplant time.
Adopt careful watering hygiene as a non-negotiable routine. Install drip irrigation lines routed directly to the root zone to eliminate all leaf wetness from irrigation water. Water only in early morning hours, giving foliage the entire day to dry completely before cool dusk humidity sets in. During extended rainy periods, temporarily prop up dense catnip branches with small stakes to lift leaves away from damp soil and boost cross-airflow through the bush interior.
Implement regular pruning and seasonal sanitation cycles. Perform light tip pinching in late spring to encourage bushy, open growth, and complete a hard cutback to half the plant height after the first major bloom flush to remove dense lower foliage prone to mildew and leaf spot. At the first hard autumn frost, trim all above-ground stems down to two to three inches above soil level, then clear all fallen leaves and debris from the planting area to eliminate overwintering pathogen spores and insect eggs. Add a thin layer of straw mulch around the root zone for winter insulation, keeping mulch two inches away from stem bases to avoid moisture buildup.
Rotate catnip planting locations every two to three years to break soil pathogen cycles, especially if your garden has a history of root rot or white mold. Avoid grouping catnip with other mint-family herbs that share identical disease vulnerabilities; separate Nepeta cataria beds from mint, catmint, lemon balm and basil by a minimum of five feet. Introduce organic soil amendments annually, such as well-aged compost, to feed beneficial soil microbes that outcompete harmful root rot fungi naturally without relying on synthetic fungicides.
For gardeners harvesting catnip for tea and cat toys, disease prevention carries extra importance. Mold, mildew and bacterial lesions leave bitter, off-tasting compounds in leaf tissue and can trigger mild digestive upset in cats and humans who consume contaminated foliage. Consistent proactive care avoids wasted harvests and ensures every cutting you dry remains clean, aromatic and safe for both pets and personal herbal use.
Nepeta cataria’s reputation as a low-maintenance herb holds true only when gardeners avoid the environmental missteps that trigger fungal, bacterial and secondary pest-related diseases. Powdery mildew, soil-borne root rot, leaf spot complex and pest-fueled mold disorders all stem from four core mistakes: insufficient sunlight, poor drainage, trapped leaf moisture, and overcrowded growth. Every disease covered in this guide has clear, identifiable visual markers to enable early diagnosis, paired with fully organic treatment methods safe for edible and pet-safe catnip harvests.
Rather than waiting for infections to appear and scrambling to treat established damage, the most successful catnip growers prioritize preventative cultural care aligned with the plant’s natural growth preferences. Full daily sunlight, well-drained alkaline soil, base-only watering, wide plant spacing, seasonal pruning and annual garden sanitation create a growing environment where pathogens cannot gain a foothold. Even beginner gardeners can implement these straightforward routines to maintain thick, vibrant catnip bushes loaded with aromatic nepetalactone-rich foliage, free from disfiguring disease year after year. With consistent monitoring and simple organic intervention when minor symptoms emerge, your Nepeta cataria patch will remain resilient, productive, and visually healthy across every growing season.
Advertisement
Learn More
-

- October 20,2026
- Lily Disease Guide: Whats Killing Your Lilium longiflorum and How to Stop It
-
- September 17,2026
- Wax-Leaf Privet Diseases: Identification, Treatment & Prevention Guide
-
- September 1,2026
- Vinca Minor Diseases: Identification, Treatment and Long‑Term Garden Management
-
- August 18,2026
- Tree Philodendron Diseases: Identification, Treatment and Long‑Term Prevention
-
- August 6,2026
- Common Ailments of Plantago major: Identifying, Treating and Preventing Diseases in Broadleaf Plantain
-
- July 30,2026
- Zodiac-themed Bouquets Combined with Floral Language: Different Color Schemes Create More Artistic Birthday Surprises


Advertisement

 Poisonous and danger
 Edible and medicinal
 Wild and common weed