
Detailed Planting Steps for Quercus palustris in a Home Garden!
Advertisement
If you’re looking to add a stunning, long-lived shade tree to your home garden, Quercus palustris, commonly known as pin oak, is one of the best choices you can make. Famous for its unique tiered branch structure, glossy deep-green foliage, and vivid scarlet autumn leaves, this native deciduous tree brings layered beauty to residential landscapes year-round.
Unlike many finicky ornamental trees, pin oak is tough, adaptable, and tolerant of urban environments, wet soil, and mild pollution, making it perfect for backyard gardens, front-yard landscaping, and open lawn spaces.
However, many home gardeners struggle with stunted growth, yellowing leaves, or weak canopy development simply because they skip key planting steps. Proper planting is the foundation of a healthy pin oak that can thrive for over a century. This step-by-step guide will walk you through every detailed, beginner-friendly planting process for Quercus palustris in a home garden, from site selection to post-planting maintenance.
Before diving into specific planting steps, it’s essential to understand the core growth habits of pin oak to avoid common mistakes. Unlike most oak trees that prefer dry, elevated ground, Quercus palustris naturally grows in swampy lowlands and moist floodplain areas. It loves consistent soil moisture but hates waterlogged, airless root environments. Its most common growth issue in home gardens is iron chlorosis, a yellow leaf condition caused by alkaline soil, which many new gardeners fail to prevent during planting.
Additionally, pin oak develops a distinct layered branch shape with upward upper limbs, horizontal middle branches, and drooping lower branches, requiring ample open space to grow naturally without pruning damage. With targeted pre-plant preparation and standardized planting operations, you can easily help your pin oak take root steadily and grow vigorously year after year.
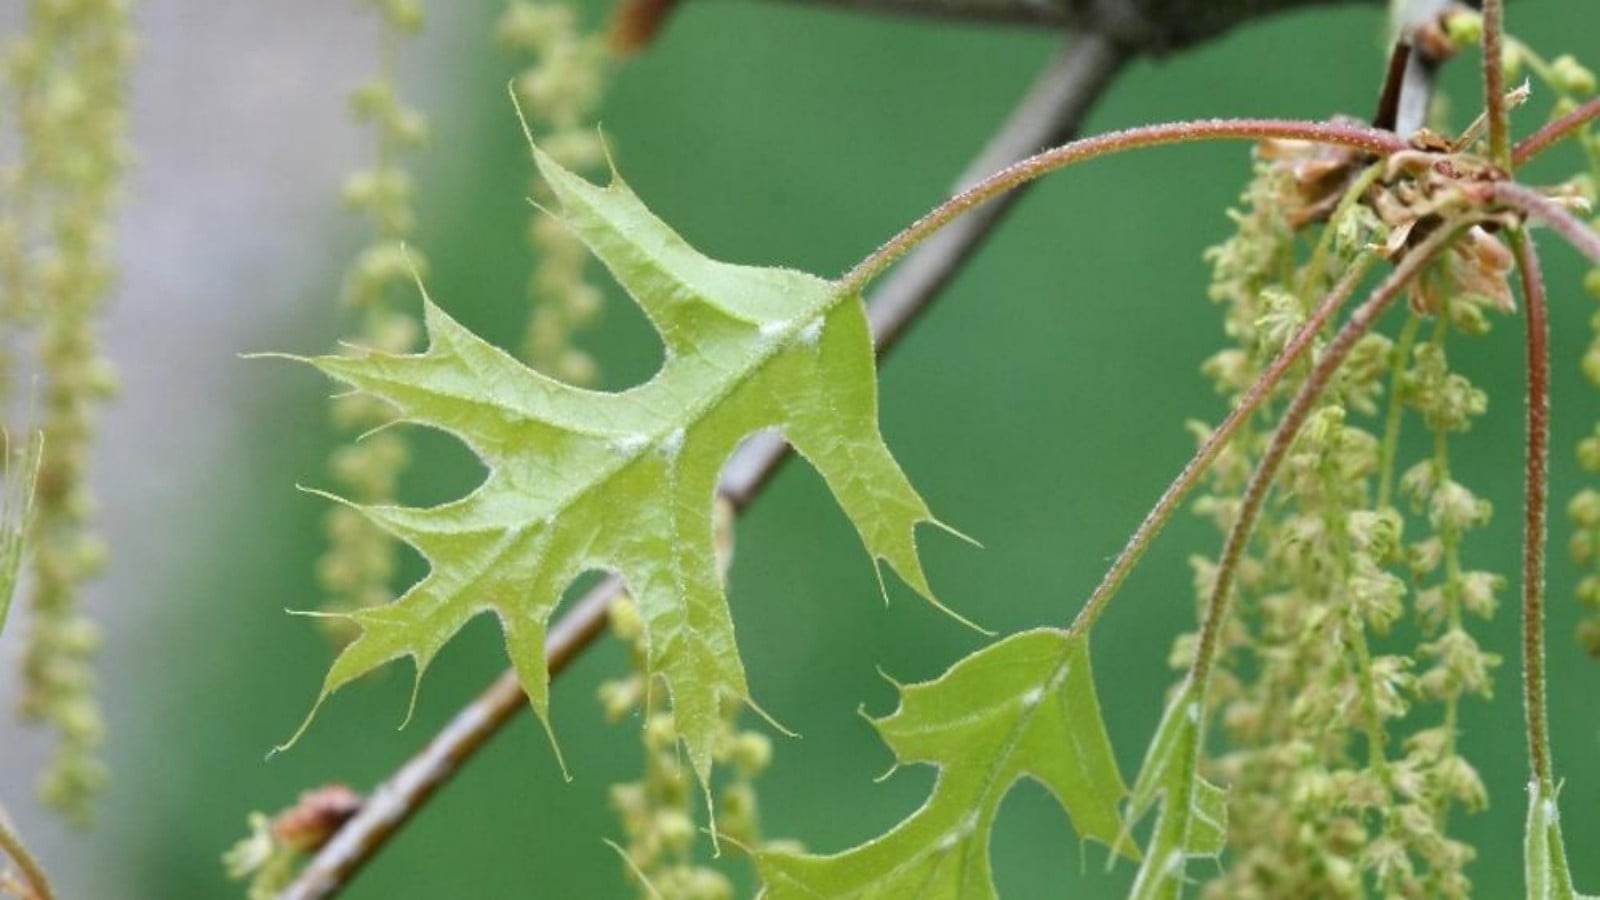
Step 1: Careful Site Selection and Space Planning (The Most Overlooked Key Step)
Site selection is the foundation of successful pin oak planting, and rushing this step is the number one mistake new gardeners make. First and foremost, pin oaks require full, unobstructed sunlight to thrive. This tree needs a minimum of six to eight hours of direct natural sunlight every day throughout the growing season. Partial shade or long-term dappled sunlight under taller trees, beside houses, or near tall fences will lead to a host of problems: thin, leggy branch growth, sparse leaf coverage, dull autumn color, and drastically reduced disease resistance. Even young saplings will struggle to establish themselves in shaded spots, so always choose an open, exposed lawn area with zero overhead blockage for your planting site.
Equally important is long-term space planning. It’s easy to underestimate how large a mature pin oak can grow. Fully grown Quercus palustris trees reach heights of 70 to 80 feet, with a wide, spreading canopy that can span 40 to 60 feet across. For residential gardens, you must reserve plenty of room to avoid future conflicts. Keep your planting spot at least 25 to 30 feet away from your home’s foundation, outdoor patios, driveways, underground utility lines, and boundary fences. Planting too close will lead to crowded root systems, restricted canopy growth, and even structural damage to your property as the tree matures. Additionally, avoid low-lying depressions in your yard that collect standing water after rain or irrigation. While pin oaks tolerate moist soil better than most oaks, persistent stagnant water will suffocate young feeder roots and trigger fatal root rot. A flat or slightly elevated open garden plot with natural drainage is absolutely ideal for long-term healthy growth.
Step 2: Soil Testing and Targeted Pre-Plant Soil Improvement
Soil quality and pH balance make or break pin oak growth, and this is where most home gardeners go wrong. Quercus palustris has strict soil preferences: it demands acidic soil with a pH range of 4.5 to 6.5. Alkaline soil is the biggest threat to pin oaks in residential landscapes. Most backyard garden soil is neutral or slightly alkaline due to lawn fertilizers, concrete runoff, and naturally high mineral content. In alkaline conditions, iron and other key nutrients become locked in the soil, impossible for the tree’s roots to absorb. The result is iron chlorosis, a condition that turns leaves pale yellow, stunts new growth, and causes gradual branch dieback over multiple growing seasons.
Before digging any holes, invest in an affordable home soil test kit to check your garden’s pH level and nutrient composition. If your soil tests above 6.5 pH, you’ll need to amend it to lower alkalinity and boost acidity naturally. The best organic amendments for pin oaks are aged pine bark mulch, decomposed oak leaf humus, peat moss, and well-rotted forest compost. These materials gradually acidify the soil over time, improve soil structure, and add organic nutrients without shocking young roots. Never mix lime, alkaline garden fertilizer, or fresh uncomposted manure into your planting soil—these will raise pH levels and cause immediate growth issues.
Pin oaks adapt well to loamy, sandy-loam, and lightly clay soil, but heavy compacted clay soil common in suburban yards requires extra treatment. Compacted soil traps water, blocks airflow, and restricts root expansion. To fix this, mix coarse horticultural sand and organic compost into the native soil to loosen dense texture, improve drainage, and create a loose, breathable growing medium for new roots. Well-amended acidic, loose, consistently moist soil gives your pin oak sapling the perfect environment to establish strong, wide-spreading roots in its critical first year of growth.
Step 3: Digging the Perfect Planting Hole (Wide and Shallow, Not Deep and Narrow)
A common beginner misconception is that deeper holes equal better tree growth. For Quercus palustris, this could not be more incorrect. Pin oak roots grow wide and shallow, spreading horizontally just below the soil surface to absorb moisture and nutrients. Deep, narrow planting holes force roots downward, restricting their natural expansion and leaving the tree unstable and prone to drought stress. The golden rule for pin oak planting holes is wide and shallow.
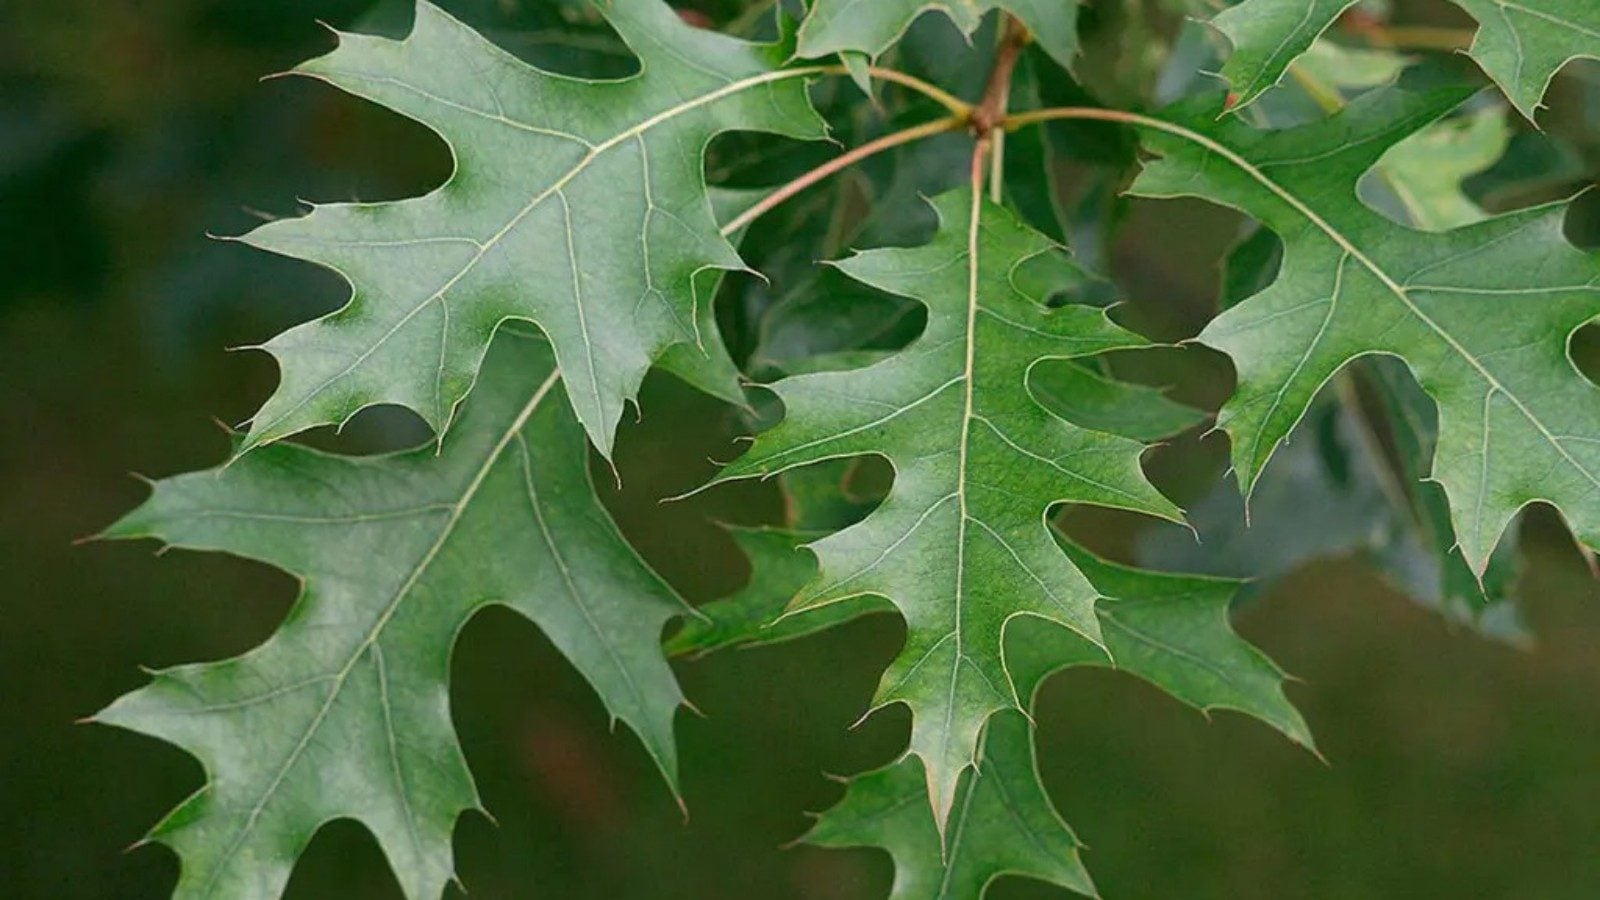
Your finished planting hole should be two to three times wider than the sapling’s entire root ball, with a depth that exactly matches the height of the root ball. This gives new roots plenty of loose soil to spread outward quickly and anchor the tree firmly. When digging, separate topsoil and subsoil intentionally. The dark, nutrient-rich topsoil from the upper 8 to 12 inches of ground is perfect for backfilling, while the harder, less fertile subsoil can be discarded or mixed with extra compost for future garden use.
Smooth out the rough walls and flat bottom of the hole with a garden rake to eliminate hard soil clods. Hard, compacted hole walls act as a barrier, trapping roots and preventing outward growth. For yards with poor drainage, dig three to four small auxiliary drainage trenches around the base of the planting hole before backfilling. These small trenches allow excess rainwater to seep away quickly, eliminating the risk of root rot during heavy rainy seasons without drying out the soil completely.
Step 4: Sapling Preparation and Precise Placement
Most home gardeners purchase container-grown or ball-and-burlap pin oak saplings from local nurseries, and both types require gentle pre-plant preparation. For container saplings, carefully remove the plastic nursery pot, taking care not to tear or damage the root ball. Many nursery-grown saplings develop circling roots that wrap tightly around the root ball. Gently loosen these bound roots with your fingers or a small garden fork to break the circular growth pattern. This simple step encourages roots to spread outward into the native garden soil instead of continuing to grow inward and strangle the tree over time.
For ball-and-burlap saplings, remove all twine, wire, and synthetic burlap wrapping completely before planting. These materials do not decompose quickly underground and will constrict root growth, cut off nutrient flow, and weaken the tree long-term. Once your sapling is prepped, set it perfectly in the center of the planting hole. The most critical detail here is aligning the root flare—the swollen junction where trunk meets roots—exactly level with the garden soil surface.
Buried root flares are the leading cause of mature pin oak decline in home gardens. Even a few inches of excess soil covering the root flare will trap moisture, cause trunk rot, invite pests and fungal disease, and slowly kill the tree over years. Take your time to adjust the sapling’s height and ensure it stands perfectly straight and vertical. Once positioned correctly, begin backfilling in thin, even layers of topsoil. After each layer, gently tamp the soil down with your hand or a small tool to eliminate air pockets. Unfilled air pockets cause roots to dry out, create unstable growth, and lead to sapling leaning or tipping in wind and rain.
Step 5: Initial Watering, Soil Settling, and Protective Mulching
Proper post-planting watering is what seals in all your pre-plant preparation work and helps the sapling recover from transplant shock. Immediately after finishing backfilling, administer a deep, slow saturation watering. Avoid fast, forceful sprays that wash away topsoil or expose young roots. Water slowly and evenly across the entire planting zone until the soil is completely saturated several inches deep. This initial watering merges the root ball with the surrounding garden soil, eliminates leftover air gaps, and hydrates every new root fiber.
In the first full growing season, consistent moisture is non-negotiable for young pin oaks. Water deeply once every five to seven days during dry, hot weather, maintaining steady mild soil moisture. Let the top inch of soil dry slightly between waterings to avoid over-saturation. Established mature pin oaks handle short droughts well, but newly planted saplings have fragile, underdeveloped root systems and cannot tolerate dry conditions.
Once the initial water fully settles into the soil, apply a protective mulch layer. Use organic acidic mulch materials including pine wood chips, shredded pine bark, or decomposed oak leaves. Spread a 2 to 3-inch thick layer evenly across the entire root zone, extending a few inches past the edge of the planting hole. Mulch serves multiple essential purposes: it locks in soil moisture, regulates soil temperature in hot summers and cold winters, suppresses weed growth that competes for nutrients, and slowly decomposes to maintain acidic soil pH over time. Always leave a 2-inch gap between the mulch and the tree trunk. Piling mulch directly against the bark causes rot, harbors harmful insects, and promotes fungal infections that damage young trees.
Step 6: Early Pruning, Fertilization, and Seasonal Maintenance
Newly planted pin oak saplings need minimal pruning in their first year of growth. Heavy early pruning drains stored tree energy, slows root establishment, and weakens young saplings. Your only pruning task for the first 12 months is removing dead, broken, diseased, or crossing small branches. This cleans up the tree’s structure and prevents disease spread without disrupting healthy growth. Any major shaping or structural pruning should wait until the tree enters full winter dormancy, after all leaves have dropped. Pruning during the growing season causes sap loss and increases the risk of fatal oak wilt infection.
Fertilization is another area where less is more for new pin oaks. Never apply fertilizer within six months of planting. Freshly disturbed roots are extremely tender and easily burned by synthetic fertilizers, which can kill a healthy sapling quickly. After six months, if new spring growth appears pale or slow, apply a mild, slow-release acidic tree fertilizer designed for oak and azalea species. Use a light dosage only—over-fertilization produces soft, weak new growth that attracts pests and fails to harden off before winter frost.
Throughout the first two years, make routine checks on your pin oak’s condition. Monitor soil moisture after heavy rain to ensure no standing water accumulates around the root zone. Refresh mulch annually to maintain thickness and preserve soil acidity. Check for common early issues like yellowing leaves, aphids, or leaf spot fungus, and address minor problems immediately before they escalate. As your sapling matures, it will gradually develop its iconic tiered canopy, require less frequent watering, and become increasingly low-maintenance.
Final Thoughts
Planting Quercus palustris in a home garden is not a complicated task, but it demands patience, attention to detail, and respect for the tree’s unique natural growth habits. Unlike generic landscape trees, pin oaks thrive when their specific needs for acidic soil, full sunlight, consistent moisture, and uncramped growing space are met. Skipping soil testing, planting too deep, neglecting mulch, or over-pruning are small mistakes that lead to big problems years down the line.
By following this complete step-by-step planting process, you give your pin oak the strongest possible start. With minimal ongoing care, it will grow steadily each year, providing lush summer shade, breathtaking fall color, and timeless landscape beauty for generations. For any homeowner looking to invest in a permanent, high-value tree for their garden, the pin oak is an unbeatable choice when planted correctly.
Advertisement
Learn More
-

- October 20,2026
- Lily Disease Guide: Whats Killing Your Lilium longiflorum and How to Stop It
-
- September 17,2026
- Wax-Leaf Privet Diseases: Identification, Treatment & Prevention Guide
-
- September 1,2026
- Vinca Minor Diseases: Identification, Treatment and Long‑Term Garden Management
-
- August 18,2026
- Tree Philodendron Diseases: Identification, Treatment and Long‑Term Prevention
-
- August 6,2026
- Common Ailments of Plantago major: Identifying, Treating and Preventing Diseases in Broadleaf Plantain
-
- July 30,2026
- Zodiac-themed Bouquets Combined with Floral Language: Different Color Schemes Create More Artistic Birthday Surprises

Advertisement
 Poisonous and danger
 Edible and medicinal
 Wild and common weed