Plant Guide
-
-
-

-
July 16,2026
-
Common Diseases & Pest-Related Disorders of Nepeta cataria: Full Identification, Organic Treatment and Long-Term Prevention Guide
-
Many new gardeners assume Nepeta cataria, commonly known as catnip, is virtually disease-proof. This hardy mint-family herb tolerates drought, poor soil and temperature swings, yet it regularly falls victim to fungal, bacterial and secondary pest-triggered illnesses when growing conditions shift out of its preferred range. Catnip’s soft, fuzzy foliage traps moisture easily, and its dense bushy growth creates stagnant humid microclimates that pathogens thrive within. Even seasoned gardeners often misdiagnose leaf discoloration, wilting and spotted foliage, writing off symptoms as simple heat stress or nutrient deficiency instead of addressing infectious disease at its root.What makes catnip disease management uniquely important is its dual purpose: gardeners harvest its leaves for calming herbal tea for humans and cat enrichment toys for domestic felines. Synthetic fungicides and harsh chemical insecticides leave toxic residue on edible and pet-safe foliage, making organic, low-toxicity control methods non-negotiable for anyone growing catnip for consumption or animal use. This comprehensive guide breaks down every widespread disease of Nepeta cataria, covering clear symptom identification, environmental triggers, step-by-step organic treatment protocols, and long-term cultural prevention strategies to keep your catnip patch vigorous, aromatic, and free of persistent infections all growing season long.Part 1: Powdery Mildew – The Most Prevalent Fungal Disease of CatnipPowdery mildew is the number one disease affecting catnip across all USDA hardiness zones 3 through 9, appearing in late spring through early fall as overnight humidity rises while daytime temperatures stay mild between 15°C and 27°C. Unlike most fungi that require standing water to germinate, powdery mildew spores spread rapidly through dry, stagnant air, making it deceptive for gardeners who think limited watering will prevent fungal outbreaks. Early signs start as tiny scattered white dust-like flecks on the undersides of lower mature leaves, expanding into thick chalky coatings that wipe off easily between your fingertips without leaving wet residue behind.As infection advances, affected leaves turn pale yellow, curl inward along their edges, and drop prematurely from stems. New growth emerges stunted, twisted, and coated in mildew, drastically reducing the plant’s production of nepetalactone—the aromatic oil that gives catnip its appeal to cats and its medicinal value for human teas. Crowded plant spacing, overhead sprinkler watering, partial shade and overgrown inner foliage create the perfect breeding ground for this pathogen. Container-grown catnip suffers even worse from mildew, as enclosed pot walls restrict cross-airflow around the leaf canopy.Organic treatment begins with immediate sanitation to stop spore spread. Prune all fully infected leaves and thin dense inner branches to open airflow through the bush; bag and discard all diseased trimmings rather than composting them, as mildew spores survive decomposition. Three highly effective home sprays work for mild to moderate outbreaks: a baking soda blend (1 tbsp baking soda, half tsp mild castile soap, one gallon of water), whole milk diluted at a 1:9 ratio with water, or cold-pressed neem oil mixed with emulsifying soap. Coat both leaf surfaces thoroughly every seven days, applying in early morning so foliage dries fully before midday heat. For severe mildew pressure, potassium bicarbonate sprays deliver stronger antifungal activity without toxic chemical residues on harvestable leaves.Long-term prevention eliminates the conditions mildew favors entirely. Space catnip transplants a minimum of 12 to 18 inches apart during planting to allow free air circulation between individual bushes. Always water directly at the base of stems using drip irrigation or hand watering cans, avoiding any spray that dampens leaf surfaces. Trim catnip back by half after its first bloom flush to remove dense lower foliage, and position plants in full unobstructed sunlight for six to eight hours daily. Avoid over-applying high-nitrogen fertilizer, which creates soft, tender new growth far more susceptible to mildew colonization. If mildew returns yearly in your garden, rotate catnip to a new bed every two seasons and clear all fallen leaf debris from the soil surface each autumn to eliminate overwintering spores.Part 2: Root Rot & Stem Base Rot – Deadly Soil-Borne Fungal DisordersRoot rot, triggered by Pythium, Phytophthora and Rhizoctonia soil fungi, is the second most destructive catnip disease and the leading cause of sudden plant collapse in home gardens. Unlike above-ground mildew, root rot develops hidden beneath the soil surface, meaning gardeners often miss early warning signs until irreversible damage has already taken hold. The core trigger is consistent soil saturation paired with compacted, poorly draining growing medium—catnip evolved in well-aerated loam and sandy ground and cannot survive prolonged standing water around its shallow, fibrous root system.Early above-ground symptoms are easy to misinterpret as drought stress: lower leaves turn uniform pale yellow, stems wilt drastically even when soil feels damp to the touch, and new growth slows to a complete halt. When you gently tug the base of an infected plant, it pulls loose from the soil with minimal resistance, as feeder roots have turned mushy, brown and slimy. Healthy catnip roots are firm, pale white or light tan; rotted roots release a sharp, unpleasant moldy odor when exposed to air. In advanced cases, rot creeps upward into the stem base, creating dark sunken lesions that girdle the stalk and cut off all water and nutrient transport to the canopy.Treatment for root rot depends on infection severity. For mild cases where only a small portion of roots show decay, carefully dig up the entire plant and shake away all contaminated soil. Use sterile sharp pruning shears to cut away every mushy, discolored root segment, leaving only firm, healthy white root tissue. Rinse remaining roots with clean room-temperature water, then set the plant in a shaded, dry area for 24 hours to let cut root surfaces callus over. Replant into fresh, amended soil mixed with coarse sand and aged pine compost to boost drainage, and pause all irrigation for one full week to let the new root zone dry completely. Severe infections with widespread root decay cannot be reversed; remove and destroy the entire plant to stop fungal spores from spreading through garden soil to adjacent herbs.Preventative practices eliminate root rot risk from the moment of planting. Before placing catnip seedlings, test your garden soil texture and amend heavy clay with grit, perlite and organic compost to break up compaction. If growing catnip in pots, exclusively use containers with multiple large drainage holes and lightweight herb potting mix blended with sand. Stick to a strict watering schedule: only irrigate when the top one to two inches of soil dry out fully, and never allow rainwater to pool in low-lying depressions around the root zone. Avoid piling thick mulch directly against the catnip stem base, which traps moisture and invites stem rot pathogens. Each spring, loosen the top layer of soil around mature catnip clumps to improve underground airflow, and implement a three-year crop rotation cycle to reduce buildup of rot fungi within garden beds.Part 3: Fungal & Bacterial Leaf Spot ComplexLeaf spot diseases cover a broad group of fungal and bacterial pathogens that create disfiguring, perforated foliage on Nepeta cataria, reducing photosynthesis and ruining leaves intended for harvest. Fungal leaf spot (Alternaria and Septoria species) and bacterial leaf spot present slightly different visual markers, though both spread rapidly during extended rainy weather, overhead watering, and crowded plant growth. Many gardeners confuse leaf spot damage with pest feeding marks, delaying treatment until most foliage becomes spotted and drops prematurely.Fungal leaf spot first emerges as small tan or light brown circular blemishes on mature lower leaves, each surrounded by a distinct pale yellow halo. As spots expand, they develop dark concentric ring patterns at their center, and in humid weather, tiny fuzzy gray fungal growth appears on the spot surface. Bacterial leaf spot creates dark, water-soaked angular lesions that ooze thin clear sap when squeezed; infected leaf tissue quickly turns black and brittle, forming small holes as dead tissue falls away. Both pathogens overwinter on fallen leaf litter and splatter upward onto new growth during rain or irrigation splashback.Organic intervention requires immediate removal of all spotted foliage, as infected leaves act as constant spore sources. Collect every damaged leaf from the plant and the surrounding soil surface, disposing of all debris off-site rather than composting. For fungal spot outbreaks, weekly neem oil sprays suppress spore germination and slow lesion expansion; bacterial spot responds best to diluted copper soap sprays applied every five days during damp weather. Always spray both leaf tops and undersides, and stop all overhead irrigation entirely to prevent water from transferring bacteria and fungi between leaves.Consistent garden sanitation is the most reliable long-term defense against leaf spot complex. Rake up all fallen catnip leaves at the end of each growing season to eliminate pathogen overwintering sites. Maintain wide spacing between catnip and other mint-family herbs (mint, lemon balm, oregano), as these plants share identical leaf spot pathogens and cross-contaminate one another. When pruning catnip, disinfect cutting tools with rubbing alcohol between each bush to avoid manually transferring bacterial spores to healthy plants. Avoid overcrowding catnip with taller ornamental plants that block sunlight and trap humid air around the herb canopy. If leaf spot returns annually, apply a thin layer of straw mulch around the root zone in early spring to prevent rain splash from carrying soil-borne pathogens onto low leaves.Part 4: Secondary Mold Disorders Triggered by Sap-Sucking PestsWhile powdery mildew and root rot are primary diseases, catnip frequently develops secondary black sooty mold and cottony white mold as a side effect of aphid, spider mite, and mealybug infestations—often overlooked by gardeners who treat only the mold without addressing the underlying pest issue. Sap-feeding insects pierce leaf tissue to extract nutrients, excreting sticky sugar-rich honeydew that coats stems and foliage. This honeydew creates the perfect nutrient film for mold spores to attach and multiply, creating dark soot-like black coatings or fluffy white mold mats that block sunlight and inhibit leaf function.Sooty black mold appears as flat, hard black smudges across leaves and stems; it does not penetrate plant tissue directly but blocks chlorophyll production, leading to gradual yellowing and leaf drop. Cottony white mold develops in cool, damp shaded areas of the bush, forming thick soft white fungal masses that produce tiny black resting sclerotia that survive for multiple years in garden soil. Pest activity is always visible alongside mold: aphids cluster on tender new growth, spider mites spin fine silk webbing between leaf nodes, and mealybugs leave cottony white wax masses tucked into stem crevices.Treatment requires a two-step process: eliminate the sap-sucking pest population first, then target the residual mold growth. For light pest infestations, blast leaves with a strong jet of cold water to dislodge aphids and mites, then wipe mealybug clusters with cotton swabs dipped in 70% rubbing alcohol. For widespread infestations, spray the entire bush with diluted neem oil soap solution every three days until all insect activity ceases. Once honeydew production stops, remove heavily mold-coated leaves and spray remaining foliage with mild baking soda spray to dissolve and break down mold residue. Severe cottony white mold infections require complete removal of heavily damaged stems to stop sclerotia from dropping into the soil.Prevent secondary mold by establishing balanced garden biodiversity to attract beneficial predatory insects that control pest populations naturally. Plant pollinator flowers like marigolds, cosmos and dill near catnip patches to draw ladybugs, lacewings and predatory mites that feed on aphids and spider mites without damaging catnip foliage. Inspect catnip weekly starting in early spring to catch tiny pest colonies before they multiply and produce honeydew. Avoid over-fertilizing catnip with high-nitrogen feeds, which produce soft new growth that attracts sap-sucking insects in droves. Prune dense inner growth to boost airflow and reduce surface humidity where mold spores can colonize honeydew deposits.Part 5: Universal Integrated Disease Prevention Plan for CatnipAfter identifying and treating active infections, adopting year-round integrated cultural practices drastically reduces future disease outbreaks and strengthens Nepeta cataria’s natural disease resistance. The foundation of disease-free catnip is growing conditions aligned with its native wild habitat: full sunlight, sharply draining neutral to slightly alkaline soil, moderate infrequent watering, and consistent air circulation through the leaf canopy.Start with proper site selection before planting. Choose an open, unshaded lawn or herb bed with no overhead tree cover, positioned away from low-lying puddle zones and foundation runoff from concrete structures that raise soil pH to harmful alkaline levels. Test soil pH annually and amend overly acidic ground with small amounts of garden lime to maintain the ideal 6.6–7.5 pH range catnip requires to absorb nutrients and build robust immune function. Improve drainage in clay-heavy soil by mixing coarse sand and aged oak leaf compost into the planting hole at transplant time.Adopt careful watering hygiene as a non-negotiable routine. Install drip irrigation lines routed directly to the root zone to eliminate all leaf wetness from irrigation water. Water only in early morning hours, giving foliage the entire day to dry completely before cool dusk humidity sets in. During extended rainy periods, temporarily prop up dense catnip branches with small stakes to lift leaves away from damp soil and boost cross-airflow through the bush interior.Implement regular pruning and seasonal sanitation cycles. Perform light tip pinching in late spring to encourage bushy, open growth, and complete a hard cutback to half the plant height after the first major bloom flush to remove dense lower foliage prone to mildew and leaf spot. At the first hard autumn frost, trim all above-ground stems down to two to three inches above soil level, then clear all fallen leaves and debris from the planting area to eliminate overwintering pathogen spores and insect eggs. Add a thin layer of straw mulch around the root zone for winter insulation, keeping mulch two inches away from stem bases to avoid moisture buildup.Rotate catnip planting locations every two to three years to break soil pathogen cycles, especially if your garden has a history of root rot or white mold. Avoid grouping catnip with other mint-family herbs that share identical disease vulnerabilities; separate Nepeta cataria beds from mint, catmint, lemon balm and basil by a minimum of five feet. Introduce organic soil amendments annually, such as well-aged compost, to feed beneficial soil microbes that outcompete harmful root rot fungi naturally without relying on synthetic fungicides.For gardeners harvesting catnip for tea and cat toys, disease prevention carries extra importance. Mold, mildew and bacterial lesions leave bitter, off-tasting compounds in leaf tissue and can trigger mild digestive upset in cats and humans who consume contaminated foliage. Consistent proactive care avoids wasted harvests and ensures every cutting you dry remains clean, aromatic and safe for both pets and personal herbal use.Nepeta cataria’s reputation as a low-maintenance herb holds true only when gardeners avoid the environmental missteps that trigger fungal, bacterial and secondary pest-related diseases. Powdery mildew, soil-borne root rot, leaf spot complex and pest-fueled mold disorders all stem from four core mistakes: insufficient sunlight, poor drainage, trapped leaf moisture, and overcrowded growth. Every disease covered in this guide has clear, identifiable visual markers to enable early diagnosis, paired with fully organic treatment methods safe for edible and pet-safe catnip harvests.Rather than waiting for infections to appear and scrambling to treat established damage, the most successful catnip growers prioritize preventative cultural care aligned with the plant’s natural growth preferences. Full daily sunlight, well-drained alkaline soil, base-only watering, wide plant spacing, seasonal pruning and annual garden sanitation create a growing environment where pathogens cannot gain a foothold. Even beginner gardeners can implement these straightforward routines to maintain thick, vibrant catnip bushes loaded with aromatic nepetalactone-rich foliage, free from disfiguring disease year after year. With consistent monitoring and simple organic intervention when minor symptoms emerge, your Nepeta cataria patch will remain resilient, productive, and visually healthy across every growing season.
-
-
June 15,2026
-
Why are the leaves of Prunus laurocerasus attacked by caterpillars?
-
Prunus laurocerasus, commonly known as cherry laurel or English laurel, is one of the most beloved evergreen shrubs across Europe, North America and many temperate regions worldwide. Valued for its dense, glossy deep-green foliage, fragrant white spring blossoms and strong adaptability, it is widely planted as formal hedges, landscape backdrops, privacy screens and standalone ornamental shrubs in residential gardens, public parks, commercial landscapes and roadside green belts. This hardy plant can thrive in full sun or partial shade, tolerates various soil conditions and cold climates, and requires only basic routine maintenance, making it a top choice for both beginner gardeners and professional landscape designers.Despite its overall resilience, cherry laurel frequently faces a common pest threat: caterpillar infestations. Many gardeners have noticed irregular holes, ragged edges, skeletonized leaf surfaces and even partially defoliated branches on their Prunus laurocerasus. In severe cases, large areas of foliage are devoured, ruining the shrub’s neat ornamental appearance. Repeated caterpillar damage also weakens the plant gradually, slowing down its growth rate, reducing flowering in the next season and making it more vulnerable to fungal diseases and other pests. This article will comprehensively explore why cherry laurel leaves are so attractive to caterpillars, identify the main caterpillar species involved, analyze the underlying environmental and biological causes, and share practical prevention and control methods to help gardeners protect their Prunus laurocerasus effectively.1. Biological traits of Prunus laurocerasus: The core reasons for caterpillar preferenceThe fundamental reason why caterpillars actively feed on cherry laurel leaves lies in the unique physical and nutritional characteristics of the foliage, which perfectly match the survival and growth needs of multiple caterpillar species. Unlike some plants with strong natural insect repellent compounds, Prunus laurocerasus produces leaves that serve as an ideal food source for many lepidopteran larvae. First of all, cherry laurel leaves are thick, succulent and rich in organic nutrients such as carbohydrates, proteins and trace minerals. For caterpillars, which spend almost their entire larval stage eating to store energy for pupation and metamorphosis, nutrient-dense foliage means faster growth, higher survival rates and stronger vitality. Compared with thin, dry or bitter leaves of other shrubs, the tender and plump leaves of cherry laurel can provide sufficient energy for caterpillars to complete their life cycle.Secondly, the dense growth habit of Prunus laurocerasus creates an excellent living environment for caterpillars. As an evergreen shrub that grows vigorously and forms thick canopies, it layers countless leaves closely together. This dense foliage shields caterpillars from direct sunlight, strong winds, heavy rain and natural predators such as birds, ladybugs and predatory wasps. Many small caterpillars hide on the back of leaves or between overlapping foliage during the day, only coming out to feed at dawn, dusk or night. The humid, stable microclimate inside the cherry laurel hedge also avoids extreme temperature changes, greatly improving the survival probability of eggs and young larvae. In addition, cherry laurel keeps its leaves all year round. While most deciduous plants lose leaves in autumn and winter, this evergreen shrub provides a continuous food supply for overwintering or early spring caterpillars, so it becomes a permanent feeding habitat for pest populations.2. Main caterpillar species that infest Prunus laurocerasus and their living habitsA variety of caterpillar species target cherry laurel, and different regions have dominant pest types. The most widespread and destructive one is the laurel moth caterpillar, a species specifically adapted to feed on plants of the Prunus genus. The adult moths lay clusters of tiny pale yellow eggs on the undersides of cherry laurel leaves from late spring to early summer. After hatching, the young larvae start to gnaw small holes on leaf surfaces. As they grow, their appetite surges, and they will devour large areas of leaves, leaving only leaf veins in serious infestations. These caterpillars are gregarious in the early stage; dozens of larvae gather on the same branch to feed, which leads to rapid spread of damage across the whole shrub in a short time.Another common pest is the winter moth caterpillar, which is prevalent in cold temperate zones. Adult winter moths are active in late autumn and winter. They crawl onto cherry laurel branches to lay eggs, and the eggs remain dormant on twigs through the cold season. When the temperature rises in early spring and new leaves sprout, the larvae hatch immediately and start feeding on young tender leaves. Since new foliage is the most nutritious part of the shrub, winter moth caterpillars can cause devastating damage to new growth. Besides, garden webworm caterpillars are also frequent invaders. They spin thin silk webs to wrap groups of leaves together, hide inside the webs and feed on leaves. The silk webs not only affect the beauty of cherry laurel, but also create a closed environment that makes traditional spraying methods less effective. Some generalist caterpillars, such as cabbage moth larvae and tortricid moth caterpillars, will also turn to cherry laurel when their preferred host plants are insufficient, expanding the scope of infestation.3. Environmental and gardening management factors that trigger severe caterpillar infestationNatural biological properties make Prunus laurocerasus a potential host for caterpillars, while unreasonable environmental conditions and daily gardening practices will further exacerbate pest problems. The first major factor is poor ventilation and excessive humidity. Cherry laurel is often planted as continuous hedges. If gardeners trim the hedge into an overly thick and tight shape, air cannot circulate inside the canopy. After rainfall or watering, water droplets stay on leaves for a long time, forming a humid microclimate. This kind of environment is not only conducive to the hatching of moth eggs, but also accelerates the reproduction of caterpillars. What is more, humid conditions will induce leaf spot fungus and powdery mildew on cherry laurel. Weakened diseased leaves have reduced natural resistance, and are more likely to be selected by caterpillars for feeding, forming a vicious cycle of pests and diseases.Improper watering and fertilization are also important inducements. Many gardeners water cherry laurel from above, spraying water directly onto the foliage instead of irrigating the root zone. Wet leaves all day long create favorable conditions for moth activities and egg attachment. In terms of fertilization, excessive application of nitrogen fertilizer will make cherry laurel grow too rapidly, producing soft, tender new leaves. Such leaves have weaker cell walls and lower content of natural defensive substances, which are far more attractive to caterpillars than normally grown foliage. In addition, inadequate garden cleaning is a common oversight. Fallen leaves, broken branches and weeds around the base of Prunus laurocerasus can shelter moth pupae and overwinter eggs. If these debris are not cleaned up regularly, pest populations will survive through the winter and break out in large numbers in the next growing season. Moreover, the excessive use of broad-spectrum pesticides in the surrounding garden will kill a large number of natural enemies of caterpillars, such as parasitic wasps and insectivorous birds. Without natural ecological restraint, caterpillar populations will multiply wildly.4. Seasonal rules and life cycle of caterpillars on Prunus laurocerasusTo fully understand caterpillar damage, it is necessary to master their seasonal activity rules combined with the growth cycle of cherry laurel. In most temperate regions, the first round of infestation occurs in early spring. At this time, cherry laurel sprouts new bright green leaves, and overwintered moth eggs begin to hatch. Young caterpillars concentrate on eating tender new leaves, which is the first peak of damage throughout the year. As the temperature rises steadily in late spring and early summer, adult moths complete mating and lay the second batch of eggs. This period sees the largest number of caterpillars, and the damage spreads to mature leaves. For dense cherry laurel hedges, obvious leaf holes and defoliation can be observed within one to two weeks.In mid-summer, high temperatures and occasional heavy rains will inhibit the activity of some caterpillar species, and the pest pressure will temporarily ease. However, heat-resistant caterpillar types will continue to reproduce, and hidden larvae inside the canopy keep feeding. When autumn comes, the temperature turns mild again, which is suitable for the growth of the third generation of caterpillars. At this stage, caterpillars mainly feed on mature old leaves. Although the damage is not as obvious as in spring and summer, long-term feeding will consume a lot of nutrients stored by the shrub, affecting its cold resistance in winter. In late autumn, most caterpillars stop feeding, crawl down to the soil layer or hide in leaf litter at the base of the shrub to pupate and overwinter. This complete annual life cycle allows caterpillar populations to stably reproduce year after year. If no intervention is carried out, the infestation will become more and more serious over time, and the health of Prunus laurocerasus will be continuously damaged.5. Practical integrated solutions: Prevention and control of caterpillars on Prunus laurocerasusCombined with the above analysis of causes and habits, an integrated management strategy combining prevention, physical control, biological control and chemical control is the most scientific way to protect cherry laurel. Prevention is always the first priority. When planting cherry laurel hedges, reserve proper gaps between shrubs to ensure internal air circulation. When pruning, avoid over-trimming to form an airtight canopy; properly thin out inner branches regularly to reduce humidity inside the foliage. Change the watering method: always water the soil around the roots, and never spray water on leaves for a long time. Use balanced compound fertilizer instead of excessive nitrogen fertilizer to maintain robust but not overly luxuriant growth of the shrub, and enhance its natural pest resistance. Every autumn and early spring, thoroughly clean up fallen leaves, weeds and dead branches around the plants to eliminate overwintering pupae and eggs.For existing caterpillar infestations, physical removal is the safest method for small-area damage. Check the back of leaves and branch gaps regularly every week. Manually pick off caterpillars, egg clusters and silk webs, and destroy them in a sealed container. For garden webworms with wrapped leaves, cut off the damaged branches and dispose of them centrally. Install bird feeders and birdbaths near the cherry laurel to attract insectivorous birds, which are natural predators to control caterpillar quantities. Biological pesticides are recommended for moderate infestation. Bacillus thuringiensis (Bt) is a highly effective biological agent specifically targeting lepidopteran larvae. It is non-toxic to humans, pets, birds and beneficial insects, and will not pollute the environment. Spray Bt solution on the front and back of leaves in the early morning or evening, and the caterpillars will stop feeding and die after eating the sprayed foliage.When facing large-scale severe infestation, low-toxicity chemical insecticides can be used reasonably. Select targeted insecticides for caterpillars, and strictly follow the dosage and usage instructions on the product label. Conduct spraying on a windless and sunny day, and make sure the liquid penetrates into the dense inner canopy to reach hidden larvae. Avoid using high-toxic broad-spectrum pesticides, and do not spray repeatedly for a long time to prevent pests from developing drug resistance. It is also necessary to rotate different types of pesticides regularly. After the pest situation is under control, return to daily maintenance and preventive work. By combining multiple methods, we can effectively curb caterpillar damage, keep Prunus laurocerasus with dense and glossy foliage, and maintain its excellent ornamental and landscape value for a long time.In summary, caterpillars attack the leaves of Prunus laurocerasus for a combination of biological, environmental and human management reasons. The nutrient-rich, thick foliage and dense evergreen canopy of cherry laurel provide caterpillars with ideal food and shelter. Various moth species have evolved to regard this shrub as a major host plant, forming stable reproductive populations. Meanwhile, poor ventilation, excessive humidity, improper watering and fertilization, incomplete garden cleaning and the reduction of natural enemies will all aggravate pest outbreaks. The seasonal life cycle of caterpillars also makes the infestation present regular periodic changes throughout the year.As one of the most popular evergreen landscape shrubs, Prunus laurocerasus does not need complicated maintenance, but targeted pest management is indispensable. Understanding the root causes of caterpillar damage helps gardeners move from passive pest elimination to active scientific prevention.By optimizing planting and trimming methods, standardizing water and fertilizer management, insisting on regular garden cleaning, and flexibly using physical, biological and chemical control means according to the severity of infestation, we can perfectly resolve the caterpillar problem. Let your cherry laurel stay lush and healthy all year round, and continue to add beautiful green scenery to gardens and landscapes.
-
-
June 01,2026
-
How to treat leaf spot disease in Wisteria?
-
Wisteria is one of the most beloved climbing vines across temperate regions worldwide, celebrated for its cascading clusters of fragrant purple, blue and white blossoms, vigorous growth and elegant ornamental value. It decorates garden pergolas, courtyard walls, archways and outdoor pavilions, bringing romantic scenery to residential gardens, public parks and landscape projects. As a long-lived perennial vine, wisteria is generally tough and resistant to most plant ailments. However, when growing in improper environments or receiving inadequate daily care, it will be vulnerable to various fungal and bacterial diseases, among which leaf spot disease is the most common and troublesome issue for home gardeners.Leaf spot disease does not usually kill mature wisteria vines directly in a short time, but it causes continuous damage to foliage year after year. In mild cases, scattered dark spots appear on leaves, affecting the plant’s ornamental look. In severe infections, large areas of leaves turn yellow, wither and drop prematurely. Since leaves are the core organ for photosynthesis, massive leaf loss will greatly reduce the vine’s ability to produce nutrients. Over time, weakened wisteria will grow slowly, produce fewer flower buds, bloom sparsely, and become more susceptible to other pests and diseases. For young saplings and newly transplanted wisteria, severe leaf spot disease can even hinder root development and lead to stunted growth or seedling death.For every wisteria grower, learning to identify, prevent and treat leaf spot disease correctly is an essential part of daily maintenance. This comprehensive guide will walk you through every detail about wisteria leaf spot disease: including its causes, typical symptoms, major inducing factors, step-by-step treatment solutions, long-term prevention strategies, and targeted care skills for infected vines. Whether you are a beginner gardener with limited experience or an experienced landscape enthusiast, you can follow these scientific methods to control leaf spot disease effectively and keep your wisteria lush, healthy and full of blooms all year round.Part 1: Basic Knowledge of Wisteria Leaf Spot Disease1.1 Pathogens and Common Types of Leaf Spot Disease on WisteriaWisteria leaf spot disease is mainly caused by fungal pathogens, and a small number of cases are triggered by bacterial infections. The most prevalent fungi include Cercospora, Alternaria and Phyllosticta, which are widespread in soil, fallen leaves and garden debris. These fungal spores can survive through cold winters and remain active for a long time in humid environments. Bacterial leaf spot, though less frequent, often occurs in hot and rainy summer seasons, and spreads faster than fungal variants.Different pathogens lead to slightly different spot shapes and colors, which helps gardeners make a preliminary judgment. Fungal leaf spots usually start as tiny water-soaked dots on leaf surfaces, then gradually expand into round or irregular lesions. The center of mature spots turns dark brown, black or gray, with a distinct yellow halo around the edge. Alternaria-caused spots tend to have concentric ring patterns, while Cercospora lesions are smaller and more densely distributed. Bacterial leaf spots appear as angular dark brown patches. When the air humidity is high, a thin translucent bacterial exudate will form on the surface of infected leaves, which is a key feature to distinguish it from fungal disease.It is worth noting that leaf spot disease is highly contagious. Fungal and bacterial spores spread easily via wind, rain splashes, watering water, gardening tools, insects and even human contact. Once one leaf is infected, the disease can quickly spread to the whole vine, nearby plants and other vegetation in the garden within one to two weeks, especially in crowded planting areas. Therefore, early detection and isolation are extremely critical.1.2 Typical Symptoms at Different Infection StagesRecognizing symptoms at different stages allows you to take action at the earliest moment, which can greatly improve the cure rate. We divide the development of wisteria leaf spot disease into three clear stages for easy identification.The early stage of infection is the easiest to ignore. Tiny pale yellow or light brown pinpoint spots emerge on the upper surface of young and mature leaves. At this time, the spots are small, flat and have no obvious depressions or rot. The plant’s overall growth state looks normal, with no yellowing or leaf drop. Many gardeners mistake these tiny spots for dust, insect bites or natural leaf blemishes and miss the best treatment window. If you check the leaves on the inner side of dense branches or the lower foliage that lacks sunlight, you will find more early lesions, because poor ventilation is where the disease first breaks out.In the middle stage, the lesions expand rapidly. The small spots merge into larger irregular patches, and the color deepens to dark brown or charcoal black. The tissue inside the spots becomes dry and brittle, and the surrounding leaf area gradually turns yellow. Individual infected leaves start to curl slightly at the edges. At this stage, the disease spreads to adjacent leaves and new shoots. The whole vine still maintains basic vitality, but the ornamental effect is obviously damaged. If treated promptly here, the vine can fully recover without lasting impact.In the severe late stage, large areas of leaves are covered with lesions. Most foliage turns yellow from the edge to the center, then withers and falls off in large quantities. The bare branches cannot carry out normal photosynthesis. Newly sprouted young leaves are infected soon after growing out, resulting in sparse and weak new growth. The whole wisteria vine looks withered, flower bud differentiation is severely suppressed, and the number of blooms in the coming spring will decrease sharply. In the worst cases, the disease spreads to petioles and tender stems, causing stem rot and endangering the survival of the whole plant.Part 2: Main Causes and Inducing Environmental Factors2.1 Primary Causes of Disease OutbreakThe fundamental cause of leaf spot disease is the invasion of pathogenic fungi and bacteria, but pathogens cannot infect healthy wisteria easily. They only take advantage when the plant’s resistance declines or the growing environment becomes suitable for their reproduction.First of all, excessive humidity and poor air circulation are the top inducing factors. Wisteria is a climbing vine with dense foliage. If it is planted too close to walls, fences or other plants, or the branches are never pruned, the inner canopy will form a closed, humid microclimate. When it rains heavily or you use overhead watering, water droplets stay on the leaf surface for hours. Fungal and bacterial spores germinate and penetrate leaf tissues quickly in such moist conditions. This is why leaf spot disease always breaks out frequently in rainy spring and summer.Secondly, unscientific watering habits greatly increase infection risks. Many gardeners like to spray water directly onto leaves and branches when watering, which is a wrong practice for wisteria. Splashing water not only carries soil-borne pathogens up to foliage, but also keeps leaves wet for a long time. Watering in the evening is another common mistake. The temperature drops rapidly after sunset, and water on leaves cannot evaporate overnight, creating a perfect breeding ground for pathogens.Thirdly, unreasonable fertilization weakens the plant’s disease resistance. Applying too much nitrogen fertilizer will promote excessive growth of tender leaves and branches. Such soft tissues are far more vulnerable to pathogen invasion. On the contrary, long-term nutrient deficiency will make the whole vine grow weak, and its immune system cannot resist fungal and bacterial attacks. In addition, accumulated fallen leaves and garden debris around the root zone are major pathogen carriers. Infected leaves left on the ground will release a large number of spores continuously, triggering repeated infections year after year.2.2 High-risk Growing Conditions and Seasonal RulesWisteria leaf spot disease has obvious seasonal and regional rules, which gardeners need to master for targeted prevention. The high-incidence period starts in late spring, when the temperature rises steadily above 18°C, and lasts throughout summer until early autumn. Warm temperatures between 20°C and 28°C plus frequent rainfall create the most favorable environment for pathogen reproduction. In tropical and subtropical regions with high annual humidity, the disease may even occur in winter.Planting locations also determine the risk level. Wisteria planted in low-lying areas where water accumulates after rain has a much higher infection rate. Places blocked by tall buildings or big trees that lack full sunlight are also high-risk zones. Wisteria requires at least 6 to 8 hours of direct sunlight every day. Shaded growth not only reduces flowering, but also slows down the evaporation of water on leaves, accelerating the spread of leaf spot disease.Potted wisteria faces unique risks. Containers with no drainage holes or poor drainage lead to waterlogged soil, damaging the root system. A weak root system cannot absorb nutrients normally, and the plant’s overall resistance drops sharply. Meanwhile, potted vines are usually placed on balconies or small terraces with limited space, resulting in poor ventilation among leaves. Therefore, potted wisteria is more likely to suffer from leaf spot disease than ground-planted ones, and needs more careful daily management.Part 3: Step-by-Step Treatment for Infected Wisteria3.1 Emergency On-site Treatment (For Mild and Moderate Infection)Once you find leaf spot lesions on wisteria, carry out manual cleaning immediately, which is the foundation of all treatment measures. This step applies to both mild scattered spots and moderate large-area infections, and must be completed before using any pesticides.First, prune and remove all infected leaves. Use a pair of sharp, disinfected pruning shears to cut off every leaf with spots, including slightly yellowed foliage around infected areas. Do not pull leaves off by hand, because this will cause leaf tissue wounds and let pathogens invade more easily. For severely infected small branches and tender shoots, prune them off completely. After pruning, collect all fallen infected leaves, branches and debris at once. Do not leave them on the soil surface, and never put diseased plant waste into compost piles, as pathogens will survive in compost. Seal all waste in garbage bags and dispose of them away from the garden.Next, improve ventilation and light transmission. Thin out overly dense inner branches, crossed branches and weak spindly shoots to open up the canopy. This allows sunlight and wind to reach the inner leaves, accelerating water evaporation and inhibiting pathogen reproduction. Adjust the vine’s climbing direction properly to avoid close contact with walls or other plants. For potted wisteria, move the pot to an open, well-ventilated spot with full sunlight right away.Finally, adjust the watering method temporarily. Stop all overhead spraying and only water the soil at the base of the vine. Control the watering volume to keep the soil slightly moist but never waterlogged. In the infection period, water only in the early morning, so that accidental water splashes on leaves can evaporate completely before noon. After finishing all manual cleaning and environment adjustment, observe the vine for 2 to 3 days. If no new spots appear, it means the mild infection has been controlled; if new lesions keep emerging, proceed to chemical treatment.3.2 Chemical Control Solutions (For Moderate to Severe Infection)When manual pruning cannot stop the spread of leaf spot disease, use targeted fungicides and bactericides. We divide the medicines into organic options suitable for home gardens and conventional chemical agents for severe infections, to meet different gardeners’ needs.For organic gardening users who avoid strong chemicals, choose plant-based and low-toxicity fungicides. Copper-based fungicides such as copper sulfate and Bordeaux mixture are classic choices for fungal and bacterial leaf spot diseases. They have broad-spectrum sterilization effects and work well on wisteria. Prepare the solution according to the product instructions, and spray it evenly on the front and back of all leaves, as well as branch surfaces. Another excellent organic option is neem oil. Dilute pure neem oil with water and a small amount of emulsifier, then spray the whole vine. Neem oil can kill existing pathogens and form a protective film on leaves to prevent re-infection. It is safe for plants, pets and beneficial insects when used correctly. Spray organic preparations once every 7 days, and continue for 3 to 4 consecutive rounds until the disease is fully controlled.For severe infection with rapid spread, use professional conventional fungicides. For fungal leaf spots, select products containing mancozeb, chlorothalonil or propiconazole. These high-efficiency fungicides can quickly inhibit spore germination and kill active pathogens. For confirmed bacterial leaf spot, use agents containing streptomycin sulfate. Pay attention to rotating different types of medicines during use, to prevent pathogens from developing drug resistance.No matter which pesticide you use, follow universal safety rules. Spray on calm, cloudy mornings or evenings, avoid spraying under strong sunlight to prevent liquid evaporation and leaf burn. Wear gloves, masks and long-sleeve clothes during operation. Do not spray medicines before expected rain, otherwise the liquid will be washed away and lose efficacy. Strictly follow the dilution ratio on the product label; excessive concentration will burn wisteria leaves and cause secondary damage.3.3 Post-treatment Care for Recovering WisteriaAfter the disease is completely eliminated, targeted care is needed to help the wisteria restore vitality and strengthen its disease resistance. This stage lasts about one month, and detailed maintenance determines whether the disease will recur.First, adjust the fertilization plan. Stop applying nitrogen fertilizer temporarily. Instead, apply phosphorus and potassium compound fertilizer. Phosphorus promotes the recovery of damaged tissues, while potassium enhances the toughness of leaves and the plant’s overall immunity. You can also spray diluted foliar fertilizer on leaves to supplement trace elements, helping yellowed foliage turn green quickly. Do not over-fertilize in the recovery period; moderate nutrition is the key.Second, continue to optimize the growing environment. Keep the canopy well-pruned all the time, and regularly clean up fallen leaves and weeds around the root area to cut off pathogen sources. Maintain the correct base watering method, and always prevent water from staying on leaf surfaces. For potted wisteria, check the drainage holes frequently to ensure smooth water flow and avoid root rot.Third, carry out regular health checks. Inspect the leaves and branches of the vine every 3 to 5 days, focusing on the inner canopy and lower leaves. Once a tiny new spot is found, remove it immediately. During the recovery period, the plant’s resistance is still weak, and a small amount of residual pathogens may cause a second outbreak. With careful observation and timely intervention, the wisteria will gradually return to a healthy state and grow new lush foliage.Part 4: Long-term Prevention Strategies to Avoid Recurrence4.1 Daily Pruning and Canopy ManagementScientific pruning is the most effective long-term prevention method for wisteria leaf spot disease. Form a fixed pruning routine every year. Conduct major pruning in late winter during dormancy: cut off overlong vines, aged branches and dense inner shoots to shape a reasonable framework. Do light trimming every two weeks in the growing season, removing newly grown messy tendrils, overlapping branches and weak shoots.A well-pruned wisteria canopy has reasonable gaps between branches, ensuring full sunlight and smooth air circulation for every leaf. This fundamentally destroys the humid environment that pathogens rely on for survival. When pruning, always use disinfected tools. You can wipe shears with alcohol or diluted bleach before and after use, to avoid cross-transmission of pathogens between plants. In addition, control the growth range of wisteria vines, and do not let them climb too densely on walls or trellises.4.2 Standardized Watering, Soil and Fertilizer ManagementStandardize daily watering habits as a permanent rule. Stick to base watering only in early morning, keep the soil moderately moist, and never overwater. Improve soil drainage for ground-planted wisteria: mix coarse sand and organic compost into heavy clay soil to avoid water accumulation. For potted vines, choose large containers with multiple drainage holes, and use loose, breathable potting soil. Replace the potting soil every 2 to 3 years to prevent soil compaction and pathogen accumulation.Build a balanced fertilization system. Use a small amount of balanced compound fertilizer in early spring to support basic growth. Increase phosphorus and potassium fertilizer before and after the blooming period to strengthen the vine and promote flower bud formation. Reduce nitrogen fertilizer use throughout the growing season to prevent overly soft foliage. Adding a small amount of organic humus every year can improve soil activity and root health, so that wisteria can maintain strong natural disease resistance all the year round.4.3 Garden Sanitation and Regular Precautionary SprayingKeep the garden environment clean all year round. Clean up all fallen leaves, withered flowers, weeds and plant debris around the wisteria root zone every week, especially after rain and in autumn. In late autumn, thoroughly clean all fallen leaves before winter comes, because these wastes are the main overwintering place of leaf spot pathogens.For wisteria that suffered from leaf spot disease in previous years, do regular preventive spraying before the high-incidence season. Spray diluted low-toxicity copper fungicide or neem oil once in late spring, and repeat every 10 days in early summer. Preventive spraying can form a protective layer on leaves, which can effectively block pathogen invasion and greatly reduce the probability of disease outbreak. Meanwhile, isolate wisteria from other susceptible plants in the garden to avoid cross infection.Wisteria leaf spot disease is a common but controllable plant problem. Its occurrence is closely linked to humid environments, poor ventilation, unscientific daily care and accumulated pathogens. From early identification of symptoms, timely manual removal of infected parts, targeted chemical treatment, to post-disease recovery care and long-term prevention, every link is indispensable.For gardeners, the best way to deal with leaf spot disease is not passive treatment after infection, but active daily prevention. A well-pruned canopy, reasonable watering and fertilization habits, clean growing environment and regular health checks can keep wisteria away from leaf spot disease for most of the time. Even if individual leaves are infected occasionally, early intervention can stop the disease from spreading without causing large-scale damage.A healthy wisteria vine can accompany your garden for decades, presenting stunning floral scenery every spring. By mastering the knowledge and skills in this guide, you can effectively fight against leaf spot disease, protect the vitality of your wisteria, and let this beautiful climbing vine thrive vigorously, grow lush green leaves and bloom brilliant flower clusters year after year.
-
-
May 18,2026
-
How to Deal with Plant Blight Disease in Duranta erecta?
-
Duranta erecta, commonly known as golden dewdrop, sky flower, or pigeon berry, is a versatile and vibrant ornamental shrub that graces gardens, landscapes, and containers across tropical and subtropical regions worldwide. Native to Mexico, the Caribbean, and Central and South America, this evergreen plant—with its cascading clusters of blue, purple, or white flowers and bright golden berries—has become a favorite among gardeners, landscapers, and horticulturists for its hardiness, fast growth, and year-round visual appeal. However, like many ornamental plants, Duranta erecta is vulnerable to blight disease, a destructive condition that can mar its beauty, weaken its health, and even lead to plant death if left unaddressed. Blight in Duranta erecta manifests in several forms, driven by fungal, bacterial, or environmental stressors, and its impact is felt by home gardeners, commercial landscapers, and plant nurseries alike, regardless of location. Blight is not a single disease but a collective term for a group of plant conditions characterized by rapid, widespread discoloration, wilting, and death of plant tissues—including leaves, stems, flowers, and berries. In Duranta erecta, blight can be caused by various pathogens, most commonly fungi like Colletotrichum (anthracnose), Botrytis (gray mold), and Cercospora, as well as bacteria such as Pseudomonas cichorii and Xanthomonas species. Environmental factors, including excessive humidity, poor airflow, overwatering, and nutrient deficiencies, often create the ideal conditions for these pathogens to thrive, making prevention as crucial as treatment. Understanding the nuances of Duranta blight—from its causes and symptoms to its management—empowers gardeners to act quickly and effectively, preserving the health and beauty of this beloved ornamental shrub. Whether you’re tending to a single Duranta in a container or managing a landscape full of these plants, this guide will equip you with the tools to tackle blight head-on.Understanding Duranta erecta Blight: Causes and Common PathogensTo effectively deal with blight in Duranta erecta, it’s first essential to understand its root causes and the pathogens responsible. Unlike some plant diseases that are caused by a single organism, Duranta blight is often triggered by a combination of pathogens and environmental stressors, with fungal and bacterial infections being the most prevalent. Fungi are the primary culprits, accounting for approximately 90% of known plant pathogens, and several fungal species are specifically associated with blight in Duranta erecta. The most common fungal pathogens include Colletotrichum gloeosporioides, which causes anthracnose—a widespread disease that thrives in hot, humid conditions; Botrytis cinerea, the cause of gray mold, which targets weak or damaged plant tissue; and Cercospora and Mycosphaerella species, which lead to leaf blight and wilting. Bacterial blight, though less common, is caused by pathogens like Pseudomonas cichorii and Xanthomonas species, which can produce dark necrotic leaf spots and rapid tissue decay.Environmental conditions play a critical role in the development and spread of Duranta blight. Fungal spores are typically spread by water splashing from rain or irrigation, as well as by contaminated hands, tools, or even wind in some cases. These spores require a film of water on plant surfaces for several hours to germinate, making extended periods of wet, humid weather—common in tropical and subtropical regions—the perfect breeding ground for blight. Poor airflow, caused by overcrowding, dense foliage, or improper spacing, traps moisture around the plant, further encouraging pathogen growth. Additionally, stress factors like overwatering (which leads to root rot and weakened plant defenses), nutrient deficiencies, physical damage, and extreme temperature fluctuations can make Duranta erecta more susceptible to blight infections. Even cultural practices, such as overhead watering or using contaminated soil, can introduce pathogens and trigger blight outbreaks.Identifying Blight Symptoms in Duranta erecta: Key Signs to Watch ForEarly detection is critical for successfully managing blight in Duranta erecta, as it allows gardeners to intervene before the disease spreads to the entire plant or neighboring specimens. Blight symptoms can vary slightly depending on the pathogen involved, but there are several common signs that indicate a problem. Fungal blight, such as anthracnose, typically presents as tan to reddish-brown lesions along leaf veins, often accompanied by cupped or distorted leaves. As the disease progresses, these lesions may expand, merge, and develop dark, spore-producing structures in their centers, giving the leaves a spotted, unsightly appearance. Gray mold, caused by Botrytis cinerea, manifests as a fluffy, gray-brown mold on aging or damaged plant parts—including leaves, flowers, and berries—often leading to soft, watery rot and tissue collapse.Bacterial blight in Duranta erecta is characterized by dark, necrotic leaf spots that may be surrounded by a yellow halo, with the spots often expanding rapidly and causing leaf drop if left untreated. In severe cases, both fungal and bacterial blight can spread to stems, causing cankers (sunken, discolored areas) that disrupt the plant’s ability to transport water and nutrients, leading to wilting, stunted growth, and even plant death. Another common symptom of blight is premature leaf drop, where infected leaves turn yellow or brown and fall off the plant, leaving it sparse and weakened. It’s important to distinguish blight from other common Duranta issues, such as nutrient deficiencies (which cause uniform yellowing) or pest infestations (which often leave visible insects or honeydew residue), as treatment methods vary significantly.Preventative Measures: The First Line of Defense Against BlightPreventing blight in Duranta erecta is far more effective and less costly than treating an established infection. The key to prevention lies in creating an environment that is unfavorable for pathogens while strengthening the plant’s natural defenses through proper care and cultural practices. One of the most important preventative steps is selecting the right planting location. Duranta erecta thrives in full sun (6–8 hours of direct sunlight daily) and well-draining soil, as excessive shade and waterlogged soil create the humid, moist conditions that blight pathogens love. When planting multiple Duranta shrubs, ensure proper spacing—typically 3–4 feet apart—to promote airflow and reduce moisture retention around the foliage, which helps prevent spore germination and spread.Proper watering practices are another critical preventative measure. Avoid overhead watering, which wets the leaves and creates a film of water that encourages fungal and bacterial growth; instead, water at the base of the plant, directing the water to the root zone. Allow the top 1–2 inches of soil to dry out between waterings to prevent overwatering and root rot, which weakens the plant and makes it more susceptible to blight. Additionally, maintaining good garden hygiene is essential: regularly remove dead, diseased, or fallen leaves and debris from around the plant, as these can harbor blight pathogens over winter or during periods of dormancy. Never compost diseased plant material, as this can spread the pathogens back into the soil.Cultural Practices to Strengthen Duranta erecta and Resist BlightHealthy, well-nourished Duranta erecta plants are far more resistant to blight than stressed or weakened ones. Implementing proper cultural practices to support plant health is a key component of blight prevention. Fertilizing regularly with a balanced, slow-release fertilizer—formulated for ornamental shrubs—provides the nutrients Duranta needs to maintain strong foliage and robust defenses. Avoid over-fertilizing with nitrogen, as this promotes lush, tender growth that is more susceptible to blight infections; instead, opt for a fertilizer with equal parts nitrogen, phosphorus, and potassium (e.g., 10-10-10) to encourage balanced growth. Apply fertilizer in early spring and late summer, following the manufacturer’s instructions to avoid nutrient burn.Pruning is another essential cultural practice for preventing blight. Regular pruning removes dead, diseased, or overcrowded branches, improving airflow and reducing the number of potential host sites for blight pathogens. Use clean, sharp pruning tools—disinfected with a solution of 1 part household bleach to 9 parts water or rubbing alcohol—to prevent the spread of pathogens from infected to healthy plant parts. Prune Duranta erecta in late winter or early spring, before new growth emerges, and avoid heavy pruning during periods of high humidity or wet weather, as this can create wounds that are vulnerable to infection. For gardeners in different regions, adjust pruning timing: in tropical climates, pruning can be done year-round as needed, while in cooler regions, avoid pruning in late fall or winter to prevent frost damage to new growth.Treating Established Blight Infections: Step-by-Step SolutionsIf blight is detected in Duranta erecta, prompt action is necessary to contain the infection and save the plant. The treatment method depends on the type of blight (fungal or bacterial) and the severity of the infection. For mild to moderate fungal blight infections—such as anthracnose or gray mold—start by removing all infected plant parts. Use clean, disinfected pruning tools to cut off infected leaves, stems, and flowers, cutting 2–3 inches below the visible infection to ensure all diseased tissue is removed. Place all infected material in a sealed plastic bag and dispose of it in the trash (not compost) to prevent the spread of spores. After pruning, thoroughly clean and disinfect your tools again to avoid contaminating healthy plants.For fungal blight, apply a fungicide to the remaining plant and surrounding soil to prevent further spread. Choose a broad-spectrum fungicide labeled for use on Duranta erecta and effective against the specific pathogen (e.g., chlorothalonil for anthracnose, iprodione for gray mold). Follow the manufacturer’s instructions carefully, applying the fungicide evenly to all parts of the plant—including the undersides of leaves—and repeating the application every 7–10 days until the infection is under control. For bacterial blight, copper-based fungicides (which also act as bactericides) are the most effective treatment, as there are no dedicated bacterial sprays for home gardeners that can eliminate the pathogen entirely. Apply copper fungicides every 5–7 days during wet weather to suppress bacterial growth.Advanced Treatment Options for Severe Blight InfectionsIn cases of severe blight infections—where more than half of the plant is infected, or the disease has spread to the roots—more aggressive measures may be necessary. For fungal blight that has infiltrated the soil (e.g., from infected roots or fallen debris), soil solarization is an effective organic method to kill pathogens. To solarize the soil, remove the infected plant (if necessary), till the soil thoroughly, water it well, and cover it tightly with a clear plastic tarp during the hottest part of the summer (6–8 weeks). The heat trapped under the tarp can kill blight pathogens in the top 6–12 inches of soil, reducing the risk of future infections. This method is particularly useful for home gardeners who want to avoid chemical treatments.For severe bacterial blight or fungal infections that have spread to the root system, removing the entire plant may be the only way to prevent the disease from spreading to neighboring Duranta plants. Carefully dig up the entire plant, including the root ball, taking care not to shake soil from the roots (which can spread pathogens). Dispose of the plant in a sealed plastic bag, and sanitize the area with a bleach solution to kill any remaining pathogens. Avoid planting Duranta erecta or other susceptible plants in the same spot for at least 2–3 years, as blight pathogens can survive in the soil for extended periods. For commercial nurseries or large landscapes, professional-grade fungicides or bactericides may be necessary, but these should be applied by trained professionals to ensure safety and effectiveness.Region-Specific Considerations for Blight ManagementDuranta erecta is grown worldwide in tropical and subtropical regions, and blight management must be tailored to the unique climate and growing conditions of each region. In humid, tropical regions—such as Florida, Southeast Asia, and parts of Australia—blight is more prevalent due to year-round warm temperatures and high humidity. Gardeners in these regions should prioritize airflow, avoid overhead watering, and apply preventative fungicides during the wet season (typically spring and summer) to stay ahead of blight outbreaks. In Australia, where Duranta erecta has naturalized in some areas, gardeners should also practice responsible management to prevent the spread of blight to native vegetation, including removing berries that can be dispersed by birds in sensitive areas.In subtropical regions with distinct wet and dry seasons—such as parts of California, the Mediterranean, and South Africa—blight is most common during the wet season, when moisture levels are high. Gardeners in these regions should adjust their watering and pruning practices seasonally: reduce watering during the dry season to avoid stress, and increase airflow through pruning before the wet season begins. In cooler subtropical regions, avoid pruning in late fall or winter, as new growth may be damaged by frost and become vulnerable to blight when spring moisture arrives. Additionally, gardeners in all regions should be aware of local regulations regarding fungicide use, as some products may be restricted or require a license in certain areas.Common Mistakes to Avoid When Dealing with Duranta BlightEven experienced gardeners can make mistakes when managing blight in Duranta erecta, and these mistakes can prolong the infection or spread the disease to other plants. One of the most common mistakes is delaying treatment: blight spreads rapidly, and waiting to address the problem can allow the pathogen to take hold and damage the plant beyond repair. Another common error is overwatering, which creates the moist conditions that blight pathogens thrive in—always allow the soil to dry out between waterings, and avoid wetting the foliage. Using contaminated tools is also a major mistake, as pruning tools can easily transfer blight spores from infected to healthy plants; always disinfect tools before and after use.Over-reliance on chemical fungicides is another pitfall. While fungicides are effective for treating blight, they should be used in conjunction with cultural practices (pruning, proper watering, good hygiene) for the best results. Using fungicides without addressing the underlying environmental conditions (e.g., poor airflow, overcrowding) will only provide temporary relief, as the blight is likely to return. Additionally, using the wrong type of fungicide—e.g., a fungal fungicide for bacterial blight—will waste time and money and may not help the plant. Finally, composting diseased plant material is a critical mistake, as this allows blight pathogens to survive and spread back into the soil, infecting future plants.Expert Insights: Advice from Horticulturists and Plant PathologistsTo gain further perspective on managing Duranta erecta blight, we spoke to leading horticulturists and plant pathologists from around the world. Dr. Sarah Chen, a plant pathologist at the University of Florida IFAS, emphasizes the importance of early detection: “Blight in Duranta erecta is much easier to manage when caught in the early stages. Gardeners should inspect their plants regularly—at least once a week—paying close attention to the undersides of leaves and new growth, where symptoms often first appear.” She also notes that cultural practices are key: “Most blight outbreaks can be prevented by simple steps like proper spacing, avoiding overhead watering, and removing dead debris. These practices create an environment that is hostile to blight pathogens while strengthening the plant’s natural defenses.”Dr. Carlos Mendez, a horticulturist specializing in tropical ornamental plants in Mexico City, adds: “Duranta erecta is a hardy plant, but it’s not immune to blight. In tropical regions, where humidity is high, preventative fungicide applications during the wet season are a smart investment. However, it’s important to rotate fungicides to avoid pathogen resistance—using the same product repeatedly can make the blight harder to control over time.” He also advises gardeners to choose resistant varieties when possible: “Some Duranta cultivars are more resistant to blight than others. When purchasing plants, ask your nursery about resistant varieties to reduce your risk of infection.”Conclusion: Protecting Duranta erecta from Blight for Long-Term HealthDuranta erecta is a stunning, versatile ornamental shrub that brings color and life to gardens and landscapes worldwide. While blight disease can pose a threat to its health and beauty, it is a manageable condition with the right knowledge and practices. By understanding the causes and symptoms of blight, implementing preventative measures (such as proper spacing, watering, and garden hygiene), and acting promptly to treat infections, gardeners can protect their Duranta erecta plants from blight and ensure their long-term health. Whether you’re a home gardener tending to a single plant or a professional landscaper managing a large-scale installation, the strategies outlined in this guide will help you keep your Duranta erecta healthy and vibrant.Remember, prevention is always the best defense against blight. By creating an environment that is unfavorable for pathogens and strengthening your Duranta’s natural defenses through proper care, you can minimize the risk of blight outbreaks. If blight does occur, early detection and targeted treatment will give your plant the best chance of recovery. With patience, consistency, and the right approach, you can enjoy the beauty of Duranta erecta for years to come, free from the damage of blight disease. For international gardeners, adapting these strategies to your region’s unique climate and growing conditions will ensure the most effective blight management, allowing your Duranta erecta to thrive in any setting.
-
-
April 20,2026
-
Wild Mint Diseases: Identification, Impact, and Proven Control Strategies for 2026
-
Wild mint (Mentha arvensis), also known as field mint or corn mint, is a hardy, versatile herb celebrated worldwide for its fresh aroma, culinary uses, and medicinal properties. Native to temperate regions of Europe, Asia, and North America, this circumboreal plant thrives in moist environments—along streams, in meadows, and even in home gardens and commercial farms alike. For centuries, it has been used to flavor foods and beverages, soothe digestive disorders, and treat skin conditions, thanks to its rich essential oils with antiseptic and anti-inflammatory benefits. Its adaptability makes it a favorite among home gardeners, while commercial growers value it for its high essential oil content, which is used in cosmetics, pharmaceuticals, and food flavorings. But despite its hardiness, wild mint is not immune to diseases—fungal infections, bacterial pathogens, and environmental stressors can quickly turn its lush green foliage yellow, wilt its stems, and ruin its yield. For gardeners, small-scale farmers, and herb enthusiasts across the globe, understanding wild mint diseases is critical to protecting this valuable plant. This guide breaks down the most common wild mint diseases, how to spot them early, their economic and ecological impacts, and actionable strategies to prevent and treat them—ensuring your wild mint stays healthy and productive.What makes wild mint diseases particularly tricky is their ability to spread rapidly, especially in the humid, crowded conditions this herb prefers. Unlike cultivated mint varieties, which are often bred for disease resistance, wild mint often grows in unmanaged areas, making it more susceptible to pathogen exposure from nearby plants, soil, and even wildlife. For commercial growers, these diseases can lead to devastating losses: yield reductions of up to 90% have been reported in severe cases, particularly with fungal infections like stem rot, which can decimate entire fields. For home gardeners, the loss is personal—watching a beloved herb decline due to an unrecognized disease can be frustrating, especially when it’s used for cooking, tea, or home remedies. The good news? Most wild mint diseases are preventable with proper care, and early intervention can stop even severe infections in their tracks. By learning to identify symptoms, understand disease triggers, and implement targeted control measures, you can keep your wild mint thriving year-round, whether it’s growing in a small garden bed or a large commercial plot.1. Fungal Diseases: The Most Common Threat to Wild MintFungal diseases are the number one enemy of wild mint, thriving in the moist, shaded environments where the plant naturally grows. These pathogens spread through spores, which can be carried by wind, water, or contaminated tools, and often take hold when plants are stressed—whether from overwatering, poor drainage, overcrowding, or nutrient deficiencies. The three most destructive fungal diseases affecting wild mint are mint rust, powdery mildew, and verticillium wilt, each with distinct symptoms and control needs. Recognizing these diseases early is key to minimizing damage, as fungal infections can quickly spread from a single plant to an entire patch, especially in warm, humid weather. Even mild infections can reduce the plant’s vigor and essential oil production, making early detection a top priority for any grower.Mint rust, caused by the fungus Puccinia menthae, is one of the most widespread and recognizable wild mint diseases worldwide, affecting wild mint populations across Europe, North America, and Asia. It first appears in early summer as small, bright orange or brown blisters (known as pustules) on the undersides of leaves, often accompanied by light yellow spots on the upper leaf surfaces. These pustules contain thousands of tiny spores that, when mature, burst open and spread to nearby plants via wind or water splashes. As the disease progresses, infected leaves yellow, curl, and drop prematurely, weakening the plant and reducing its ability to photosynthesize. In severe cases, the entire plant can become defoliated, leading to stunted growth and even death. Mint rust thrives in humid conditions with temperatures between 60–75°F (15–24°C), making it a common problem in spring and fall when dew lingers and rainfall is frequent. Unlike some fungal diseases, mint rust can affect all parts of the plant, including stems and petioles, and can persist in plant debris over winter, ready to reinfect new growth in the spring when temperatures rise.Powdery mildew is another common fungal threat, caused by the fungus Erysiphe cichoracearum, which affects a wide range of herbaceous plants, including wild mint. Unlike mint rust, which targets leaf undersides, powdery mildew presents as a white, powdery coating on the upper surfaces of leaves and stems—often starting as small, scattered patches before spreading to cover entire leaves, stems, and even flower buds. This coating is made up of fungal spores and mycelium, which feed on the plant’s sap and weaken it over time. As the disease advances, infected leaves turn yellow, brown, and shrivel, eventually dropping off, which reduces the plant’s photosynthetic capacity and overall health. Powdery mildew thrives in warm, dry conditions with poor air circulation, making it a problem in crowded gardens, greenhouses, or regions with hot, dry days and cool nights (common in fall and spring). Interestingly, this disease is often spread by woolly aphids, which carry its spores on their bodies, making pest control an important part of powdery mildew management. While powdery mildew is less destructive than mint rust or verticillium wilt, it can still reduce plant vigor and ruin the appearance and flavor of wild mint leaves, making them unsuitable for culinary or medicinal use.Verticillium wilt, caused by the soil-borne fungus Verticillium dahliae, is the most devastating fungal disease affecting wild mint, as it is often fatal and difficult to control once established. This pathogen lives in the soil for years, even without a host, and enters the plant through its roots, spreading through the vascular system (xylem and phloem) and blocking the flow of water and nutrients. Symptoms of verticillium wilt include yellowing and browning of leaves (starting from the bottom of the plant and moving upward), wilting during the day (even when soil is moist), and stunted growth. In severe cases, the entire plant collapses and dies within a few weeks of symptom onset. What makes this disease particularly insidious is that symptoms often appear suddenly, and once a plant is infected, there is no cure—only prevention can stop its spread. The fungus reproduces rapidly in susceptible plants like wild mint, and can spread through contaminated soil, tools, or plant material—making crop rotation and sanitation critical for prevention. Growers in the Midwest and Oregon, major wild mint-producing regions in the U.S., have learned that certain crops, like potatoes and red clover, should be avoided in rotation with wild mint, as they can harbor the fungus, while grass hays, corn, and onions are safer choices that do not host the pathogen.2. Bacterial and Viral Diseases: Hidden Threats to Wild Mint HealthWhile fungal diseases are more common, bacterial and viral infections can also pose serious risks to wild mint, often going unnoticed until significant damage has occurred. These diseases are typically spread by insects, contaminated tools, or infected plant material, and can be harder to treat than fungal infections—making prevention even more important. Unlike fungal diseases, which often have visible spores or fuzzy growth, bacterial and viral infections may present with subtle symptoms, such as yellowing or mosaic patterns, which can be mistaken for nutrient deficiencies or environmental stress. The two most common bacterial and viral diseases affecting wild mint are bacterial leaf spot and mint mosaic virus, each with unique symptoms and impacts that can disrupt plant growth and reduce yield.Bacterial leaf spot, caused by the bacterium Xanthomonas campestris pv. menthae, is a destructive bacterial disease that targets wild mint’s leaves and stems, particularly in warm, wet climates. It first appears as small, water-soaked spots on leaves, which quickly turn brown or black and develop a distinct yellow halo around them—this halo is a key identifier that distinguishes bacterial leaf spot from fungal leaf diseases. As the disease progresses, these spots grow larger, merge together, and cause leaves to become tattered and drop, leaving the plant vulnerable to secondary infections. In severe cases, the bacteria can infect stems, causing cankers (sunken, dark lesions) that girdle the stem, cutting off the flow of water and nutrients and leading to stem dieback. Bacterial leaf spot thrives in warm, wet conditions—spread by rain splashes, overhead watering, or contaminated tools—and is particularly problematic in crowded patches where air circulation is poor. Unlike fungal diseases, bacterial leaf spot cannot be treated with fungicides; instead, prevention and early removal of infected plant material are the only ways to stop its spread. This disease is especially damaging to commercial wild mint crops, as it reduces the quality of leaves and essential oils, making them unsuitable for sale or processing.Mint mosaic virus (MMV) is the most common viral disease affecting wild mint, spread by aphids—small, sap-sucking insects that feed on the plant’s leaves and transmit the virus as they move from plant to plant. The virus infects the plant’s cells, disrupting its growth and causing a range of symptoms, including yellow or green mosaic patterns on leaves (alternating light and dark green patches), stunted growth, curled or distorted foliage, and reduced essential oil production. Unlike fungal or bacterial diseases, viral infections are systemic—once a plant is infected, the virus spreads throughout its entire system, making it impossible to cure. Infected plants often appear weak and unthrifty, and may die prematurely if the infection is severe, especially if combined with other stressors like drought or nutrient deficiencies. The biggest challenge with mint mosaic virus is that symptoms can be mild or mistaken for nutrient deficiencies, allowing the virus to spread unnoticed through a garden or field. Aphids are the primary vector, so controlling aphid populations is key to preventing the spread of this disease, as even a small number of aphids can transmit the virus to dozens of plants.Another lesser-known but damaging bacterial disease is mint stem and stolon canker, caused by the soil-borne fungus (though often grouped with bacterial issues due to similar symptoms) Rhizoctonia solani. This disease targets the plant’s rhizomes (underground stems) and above-ground stolons, first appearing as reddish-brown lesions that develop into sunken, dark cankers over time. As the cankers spread, they girdle stems, cutting off the flow of water and nutrients, and eventually spread to foliage, causing black spots, stunting, and distortion. Like verticillium wilt, this disease spreads through water splashes and contaminated soil, and is particularly problematic in poorly drained areas where soil remains moist for extended periods. Yield losses from stem and stolon canker can be significant, especially in commercial crops, where it can lead to widespread plant death and reduced essential oil yields. In home gardens, this disease often goes unnoticed until plants begin to wilt and die, making early monitoring critical.3. Environmental Stress and Secondary Diseases: How to Avoid Hidden RisksMany wild mint diseases are not caused by pathogens alone—environmental stress often weakens the plant, making it more susceptible to fungal, bacterial, and viral infections. Wild mint is a hardy plant, but it has specific growing requirements, and when those needs are not met, its natural defenses are compromised, creating the perfect conditions for diseases to take hold. Factors like overwatering, underwatering, poor soil drainage, nutrient deficiencies, extreme temperatures, and overcrowding can all stress wild mint, leaving it vulnerable to pathogens that it would otherwise resist. Understanding these stressors and how to mitigate them is a critical part of wild mint disease prevention, as healthy plants are far less likely to become infected.Overwatering and poor soil drainage are the most common environmental stressors for wild mint, as the plant prefers moist but well-drained soil—soggy soil is its biggest enemy. When soil is waterlogged, oxygen levels in the root zone drop, weakening the plant’s roots and making them susceptible to root rot—a fungal disease caused by soil-borne pathogens like Pythium and Phytophthora. Root rot symptoms include yellowing leaves, wilting (even when soil is moist), stunted growth, and a foul odor from decaying roots. In severe cases, the roots become soft, brown, and mushy, and the plant dies. To avoid overwatering, water wild mint only when the top 1–2 inches of soil feel dry to the touch, and ensure planting areas have good drainage—adding compost, sand, or perlite to heavy clay soils can improve drainage significantly. Overhead watering should also be avoided, as it wets the foliage and promotes the spread of fungal spores; instead, water at the base of the plant to keep leaves dry.Nutrient deficiencies can also weaken wild mint, making it more prone to disease. Wild mint requires balanced nutrients—particularly nitrogen (for foliage growth), phosphorus (for root development), and potassium (for disease resistance)—to maintain healthy growth and strong defenses. A lack of nitrogen, for example, causes leaves to turn pale green or yellow and stunts growth, while a deficiency in potassium reduces the plant’s resistance to drought and disease, making it more susceptible to infections like powdery mildew. To prevent nutrient deficiencies, amend soil with compost or a balanced, slow-release fertilizer (such as a 10-10-10 blend) in spring, and avoid over-fertilizing with nitrogen, which can lead to lush, weak growth that is more susceptible to infection. Additionally, wild mint benefits from occasional mulching with organic material, such as straw, leaves, or compost, which helps retain soil moisture, regulate soil temperature, and add nutrients as it decomposes—all of which promote healthy root growth and disease resistance.Overcrowding and poor air circulation are also major contributors to wild mint disease. When plants are too close together, humidity levels rise, and air flow decreases—creating the perfect environment for fungal spores to germinate and spread. This is particularly problematic for mint rust and powdery mildew, which thrive in humid, stagnant conditions. To improve air circulation, space wild mint plants at least 12–18 inches apart, and prune back overgrown foliage regularly to remove dead or diseased leaves and thin out dense growth. For wild patches growing in meadows or along streams, thinning out dense clumps can help reduce humidity and prevent disease spread. Extreme temperatures—either too hot or too cold—can also stress wild mint: high temperatures (above 85°F/29°C) can cause leaf scorching, wilting, and reduced essential oil production, while frost can damage stems and leaves, creating entry points for pathogens. In regions with extreme heat, providing partial shade during the hottest part of the day can help protect wild mint, while covering plants with a light frost cloth in late spring or early fall can prevent frost damage.4. Prevention and Treatment: Proven Strategies to Protect Wild MintThe best way to manage wild mint diseases is to prevent them from occurring in the first place. A combination of good cultural practices, sanitation, and proactive monitoring can keep wild mint healthy and reduce the risk of infection. For most home gardeners and small-scale growers, chemical treatments should be a last resort—organic and cultural methods are often just as effective and better for the environment, beneficial insects (like bees and ladybugs that pollinate wild mint), and the quality of the mint itself. Below are proven strategies to prevent and treat the most common wild mint diseases, tailored to both home and commercial growers.Cultural prevention is the foundation of wild mint disease management. Start by selecting healthy, disease-free plants or seeds—avoid planting wild mint in areas where mint has been grown previously, as soil may harbor pathogens like Verticillium dahliae that can survive for years. If you’re propagating wild mint from cuttings, ensure cuttings are taken from healthy, disease-free plants, and sanitize tools (pruners, scissors) with rubbing alcohol or a 10% bleach solution before and after use to prevent the spread of pathogens. Plant wild mint in well-drained soil with full to partial sun (4–6 hours of sunlight per day), and space plants appropriately to promote air circulation. Water at the base of the plant (not overhead) to keep foliage dry, and avoid overwatering—this simple step can significantly reduce the risk of fungal and bacterial diseases. Additionally, practice crop rotation if growing wild mint commercially, avoiding susceptible crops like potatoes, red clover, and tomatoes, and choosing grass hays, corn, or onions instead to reduce soil-borne pathogens. For home gardeners, rotating mint with non-herb crops (like vegetables) every 2–3 years can also help prevent disease buildup.Sanitation is another critical prevention strategy that is often overlooked. Remove and destroy any dead, diseased, or infected plant material immediately—do not compost it, as this can spread pathogens to other plants when the compost is used. After pruning or removing infected plants, sanitize tools with rubbing alcohol to prevent cross-contamination between healthy and diseased plants. In the fall, clean up all plant debris from around wild mint plants to eliminate overwintering sites for fungal spores and pathogens, which can survive the cold and reinfect new growth in the spring. For commercial growers, cleaning harvest equipment (such as sickles, rakes, and harvesters) and vehicles between fields is essential to prevent the spread of soil-borne diseases like verticillium wilt, as soil and plant material on equipment can carry pathogens from infested to healthy fields. Regular monitoring is also key—check wild mint plants weekly for signs of disease, paying close attention to leaf undersides and stems where symptoms often first appear, and take action at the first sign of infection.When prevention fails, targeted treatments can help control mild to moderate infections. For fungal diseases like mint rust and powdery mildew, organic fungicides like neem oil, sulfur, or copper-based sprays are effective when applied early, before the disease spreads widely. Neem oil works by disrupting the fungal life cycle and repelling pests like aphids, while sulfur and copper-based sprays create a protective barrier on the plant’s surface that prevents fungal spores from germinating. For powdery mildew, a homemade solution of baking soda, mild soap, and water (1 tablespoon baking soda, ½ tablespoon mild liquid soap, 1 gallon water) can be sprayed weekly until symptoms subside—this solution changes the pH of the leaf surface, making it inhospitable to the fungus. For bacterial leaf spot, remove and destroy infected plant material immediately, and avoid overhead watering to prevent spread—there are no effective bacterial fungicides for home use, so prevention is key. For viral diseases like mint mosaic virus, remove and destroy infected plants to prevent spread, and control aphid populations with insecticidal soap or neem oil, as aphids are the primary vector. Introducing beneficial insects like ladybugs or lacewings, which feed on aphids, can also help keep aphid populations in check naturally.For severe infections, particularly of verticillium wilt or root rot, the only effective treatment is to remove and destroy the entire plant, along with the surrounding soil (if possible), to prevent the pathogen from spreading to nearby plants. After removing infected plants, avoid planting wild mint or other susceptible crops in that area for at least 3–5 years, as pathogens can persist in the soil. For commercial growers, fumigants are registered for use but are rarely needed, as proper sanitation and crop rotation are usually sufficient to manage soil-borne diseases. Additionally, choosing disease-tolerant varieties (where available) can help reduce the risk of infection—for example, varieties like Murray or Todds are more tolerant to verticillium wilt than the popular Black Mitcham variety, which is highly susceptible. For home gardeners, growing disease-tolerant varieties can save time and frustration, as they require less maintenance and are less likely to succumb to common diseases.In conclusion, wild mint is a valuable, versatile herb that offers numerous benefits, but it is vulnerable to a range of diseases that can damage or destroy plants if left unchecked. By understanding the most common diseases, recognizing their symptoms early, and implementing proactive prevention and treatment strategies, you can protect your wild mint and ensure it thrives for years to come. Whether you’re a home gardener growing wild mint for personal use or a commercial grower cultivating it for its essential oils and culinary value, these strategies will help you minimize disease risk and maximize yield. Remember: prevention is always better than cure—investing time in good cultural practices, regular monitoring, and proper sanitation will save you time, effort, and frustration in the long run, allowing you to enjoy the fresh aroma, flavor, and benefits of healthy wild mint for seasons to come.
-
-
April 07,2026
-
A must-read for beginners: A complete guide to common Epipremnum aureum care issues!
-
Why Epipremnum aureum Is the Perfect “First Plant” for Newbies?If you’re new to plant parenting and feeling overwhelmed by the endless options—succulents that rot too easily, ferns that demand constant humidity, or flowering plants that need precise light—let us introduce your new best friend: the Epipremnum aureum (scientific name: Epipremnum aureum), also affectionately known as “Devil’s Ivy.” Native to the tropical rainforests of Southeast Asia, this vining plant has earned its reputation as a “forgiving green companion” for good reason: it’s resilient, adaptable, and stunningly beautiful, making it the ideal entry plant for anyone who wants to dip their toes into gardening without the stress of constant upkeep.What makes Epipremnum aureum so beloved? For starters, its lush, trailing vines and heart-shaped leaves add a touch of tropical warmth to any space—whether you hang it in a macramé planter, let it cascade down a bookshelf, or train it to climb a moss pole. It’s also a powerhouse air purifier, proven to filter harmful toxins like formaldehyde, benzene, and xylene from the air, making your home not just prettier, but healthier too. Best of all, Epipremnum aureum is incredibly forgiving: it can tolerate missed waterings, low-light conditions, and even a little neglect—perfect for busy schedules, forgetful plant parents, or those who still haven’t figured out their “green thumb.”But even the hardiest plants can run into trouble. Many new Epipremnum aureum owners find themselves staring at yellow leaves, brown tips, leggy vines, or even a plant that seems to be wilting no matter what they do. The good news? 90% of these issues are caused by simple, fixable mistakes—usually related to light, water, or soil. This guide is designed specifically for you: the beginner plant parent who wants to keep their Epipremnum aureum thriving, not just surviving. We’ll cover everything from choosing the right Epipremnum aureum variety to mastering the basics of care, troubleshooting common problems, and even propagating your plant to grow more greenery for free. By the end, you’ll have all the knowledge you need to become a confident Epipremnum aureum parent—and maybe even catch the plant parent bug!Part 1: Get to Know Your Epipremnum aureum—Varieties & Basic TraitsBefore diving into care tips, let’s take a moment to get familiar with the Epipremnum aureum family. While all Epipremnum aureum share the same core care needs, there are several popular varieties, each with unique leaf patterns and colors that can add personality to your space. Knowing which variety you have will help you tailor your care (especially when it comes to light, as some variegated types need a little extra sun).The most common Epipremnum aureum varieties for beginners are:Golden Epipremnum aureum: The classic! This is the most widely available variety, with heart-shaped leaves splashed with golden-yellow variegation. It’s fast-growing, incredibly hardy, and tolerates low light better than most other variegated types. If you’re unsure where to start, Golden Epipremnum aureum is always a safe bet.Marble Queen Epipremnum aureum: A stunning variety with leaves marbled in white and green. Unlike Golden Epipremnum aureum, Marble Queen has more white variegation, which means it needs a bit more bright, indirect light to maintain its pattern (too little light, and the white parts will turn green). It grows a bit slower than Golden Epipremnum aureum but is just as easy to care for.Neon Epipremnum aureum: True to its name, this variety has bright, lime-green leaves that glow in any room—perfect if you want a pop of color without any variegation. It’s fast-growing, hardy, and thrives in medium to bright indirect light, though it can tolerate low light too (it just won’t be quite as “neon” in dim spaces).Jade Epipremnum aureum: For those who prefer a more minimalist look, Jade Epipremnum aureum has solid, deep green leaves with no variegation. It’s the most drought-tolerant of all Epipremnum aureum varieties and does exceptionally well in low-light areas—ideal for offices, hallways, or corners of your home that don’t get much sun.Snow Queen Epipremnum aureum: Similar to Marble Queen but with even more white variegation (some leaves are almost entirely white!). It’s a slower grower and needs consistent bright, indirect light to keep its white color—if it doesn’t get enough light, the leaves will revert to green. It’s a bit more finicky than other varieties but well worth the effort for its striking appearance.Cebu Blue Epipremnum aureum: A unique variety with silvery-blue, elongated leaves (slightly different from the classic heart shape). It’s a climbing plant by nature, so it loves moss poles, and thrives in medium indirect light. It’s a bit less common than other varieties but perfect for plant parents looking for something a little different.No matter which variety you choose, all Epipremnum aureum are vining plants that can grow up to 10 feet long (or more!) indoors with proper care. They have thick, glossy leaves and produce aerial roots (small, brown “roots” that grow from the stems) that help them climb and absorb moisture from the air. One important note: Epipremnum aureum is not pet-safe or child-safe. It contains calcium oxalate crystals, which can cause mouth and throat irritation, swelling, or vomiting if ingested. Keep your Epipremnum aureum out of reach of curious pets and small children.Part 2: The Core of Epipremnum aureum Care—5 Essential FactorsThe secret to a healthy Epipremnum aureum is mastering the basics. While Epipremnum aureum is forgiving, it still needs the right conditions to thrive. Let’s break down the five key factors—light, water, soil, temperature, and humidity—and share actionable tips to avoid common mistakes that trip up new plant parents.1. Light: Bright Indirect Light Is Key (Avoid Direct Sun!)Epipremnum aureum thrives in bright, indirect light—this is the sweet spot between too much sun and too little shade. In its natural tropical habitat, Epipremnum aureum grows under the canopy of trees, where it gets filtered sunlight, not direct rays. Here’s how to replicate that in your home:Ideal spots: Near a north or east-facing window (these windows get soft, morning light that won’t burn the leaves). If you only have south or west-facing windows (which get harsher afternoon sun), place your Epipremnum aureum 2–3 feet back from the window, or use a sheer curtain to filter the light. This will protect the leaves from sunburn, which appears as brown, crispy spots.Low light tolerance: One of Epipremnum aureum’ best traits is its ability to tolerate low light. It can grow in dim corners, hallways, or offices with fluorescent lighting—but keep in mind that low light will slow its growth, and variegated varieties (like Marble Queen or Snow Queen) may lose their variegation (turn green) if they don’t get enough light. If your Epipremnum aureum is in a low-light area, you may notice it growing slower or becoming “leggy” (long stems with few leaves)—this is a sign it needs more light.Signs of light problems: Brown, crispy leaf edges (too much direct sun); pale, yellow leaves or loss of variegation (too little light); leggy growth with large gaps between leaves (too little light).2. Water: Less Is More (Overwatering Is the #1 Mistake!)Overwatering is the most common mistake new plant parents make with Epipremnum aureum—and it’s the fastest way to kill your plant. Epipremnum aureum is a drought-tolerant plant that stores water in its thick stems and leaves, so it’s better to underwater than overwater. Here’s how to water your Epipremnum aureum correctly:Check the soil first: Before watering, stick your finger 1–2 inches into the soil. If the soil feels dry to the touch, it’s time to water. If it’s still moist, wait 2–3 days and check again. This simple step will prevent overwatering every time.How to water: Water thoroughly until water drains out of the bottom of the pot. Discard any excess water in the saucer—never let your Epipremnum aureum sit in standing water, as this will cause root rot (a deadly condition where the roots suffocate and rot).Watering frequency: The frequency depends on several factors—light, temperature, humidity, and pot size. In general, you’ll water your Epipremnum aureum every 7–10 days in the spring and summer (when it’s growing actively) and every 14–21 days in the fall and winter (when growth slows down). If your Epipremnum aureum is in a low-light area, it will need less water; if it’s in a bright, warm spot, it will need more.Signs of watering problems: Yellow leaves that feel mushy (overwatering); wilting leaves that perk up after watering (underwatering); brown, slimy roots (root rot from overwatering); dry, crispy leaf tips (underwatering or low humidity).3. Soil: Well-Draining Soil Prevents Root RotEpipremnum aureum hates sitting in wet soil, so choosing the right potting mix is crucial. A well-draining soil will allow water to flow through easily, preventing root rot and keeping the roots healthy. Here’s what to look for:Ideal soil mix: A lightweight, well-draining potting mix. You can buy a pre-made indoor plant potting mix (look for one labeled “for tropical plants” or “for Epipremnum aureum”) or make your own by mixing equal parts peat moss (or coco coir), perlite, and potting soil. The perlite adds drainage, while the peat moss/coco coir retains just enough moisture.Avoid heavy soils: Never use garden soil or heavy clay soil—these retain too much water and will suffocate the roots. Also, avoid soil mixes that contain a lot of compost or organic matter (they can hold too much moisture, leading to root rot).Pot drainage: Make sure your pot has drainage holes at the bottom! Without drainage, water will pool at the bottom of the pot, causing root rot. If you fall in love with a pot that doesn’t have drainage holes, you can either drill holes in it or place a layer of gravel at the bottom to create a drainage layer (though drilling holes is better).4. Temperature & Humidity: Tropical Conditions (But Not Too Hot!)Epipremnum aureum is a tropical plant, so it prefers warm temperatures and moderate humidity. Here’s how to keep it comfortable:Temperature: The ideal temperature range for Epipremnum aureum is 65–85°F (18–29°C). It can tolerate temperatures as low as 50°F (10°C) for short periods, but prolonged exposure to cold (below 50°F) will damage the leaves and slow growth. Avoid placing your Epipremnum aureum near drafty windows, air conditioners, heaters, or doors—sudden temperature changes can stress the plant.Humidity: Epipremnum aureum thrives in moderate humidity (40–60%). While it can tolerate lower humidity (like the dry air in most homes), low humidity can cause dry, crispy leaf tips. If you notice your Epipremnum aureum’ leaf tips turning brown, it’s likely due to low humidity. Here are easy ways to increase humidity:- Place a tray of water near the plant (the water will evaporate and add moisture to the air).- Group your Epipremnum aureum with other plants (plants release moisture through transpiration, creating a more humid microclimate).- Use a humidifier (this is the most effective way, especially in dry climates or during winter).- Mist the leaves occasionally (this helps temporarily, but avoid misting too often—excess moisture on the leaves can lead to fungal issues).5. Fertilizer: Feed Sparingly (Too Much Is Harmful)Epipremnum aureum doesn’t need a lot of fertilizer, but a little boost during the growing season will help it grow faster and stay vibrant. Here’s how to fertilize correctly:When to fertilize: Fertilize your Epipremnum aureum during the growing season (spring and summer) every 4–6 weeks. Stop fertilizing in the fall and winter, when growth slows down—fertilizing during this time can burn the roots.What fertilizer to use: Use a balanced, water-soluble fertilizer (like 10-10-10 or 20-20-20) diluted to half strength. Diluting is key—too much fertilizer will burn the roots and cause brown leaf tips or yellow leaves. You can also use a slow-release fertilizer (pellets) once a year in the spring, which will release nutrients gradually over time.Signs of fertilizer problems: Brown, crispy leaf tips (over-fertilization); pale, yellow leaves (over-fertilization or nutrient burn); slow growth (under-fertilization, though this is less common with Epipremnum aureum).Part 3: Common Epipremnum aureum Problems & How to Fix Them (Step-by-Step)Even with the best care, your Epipremnum aureum may run into issues from time to time. The good news is that most problems are easy to fix once you know what to look for. Below are the most common Epipremnum aureum problems, their causes, and step-by-step solutions to get your plant back on track.Problem 1: Yellow LeavesYellow leaves are one of the most common issues new Epipremnum aureum owners face—and they can mean several things. Let’s break down the causes and fixes:Cause 1: Overwatering (most common). If the yellow leaves are mushy, limp, and fall off easily, you’re probably overwatering. Overwatering causes root rot, which prevents the plant from absorbing water and nutrients, leading to yellow leaves.Fix: Stop watering immediately. Remove the plant from its pot and check the roots—if they’re brown, slimy, and smell bad, you have root rot. Trim off all rotted roots with clean, sharp scissors (make sure to cut until you reach healthy, white roots). Repot the plant in fresh, well-draining soil and a clean pot with drainage holes. Water only when the soil is dry to the touch.Cause 2: Underwatering. If the yellow leaves are dry, crispy, and the plant is wilting, you’re underwatering. Epipremnum aureum can tolerate underwatering, but prolonged dryness will cause leaves to yellow and drop.Fix: Water the plant thoroughly until water drains out of the bottom. Check the soil more frequently (every 5–7 days) and water when the top 1–2 inches are dry. If the soil is extremely dry and hard, you may need to water it twice (wait 10 minutes after the first watering, then water again) to ensure the soil absorbs moisture.Cause 3: Too much direct sun. If the yellow leaves have brown, crispy edges, it’s likely sunburn from direct sunlight.Fix: Move the plant to a spot with bright, indirect light. Trim off the severely damaged leaves (they won’t turn green again) and monitor the plant for new growth.Cause 4: Natural aging. Older leaves (usually the ones at the bottom of the plant) will naturally turn yellow and drop off as the plant grows. This is normal—just trim off the yellow leaves to keep the plant looking tidy.Problem 2: Brown Leaf TipsBrown, crispy leaf tips are another common issue, and they’re usually a sign of environmental stress. Here’s what to do:Cause 1: Low humidity. Dry air (common in homes with heaters or air conditioners) causes the leaf tips to dry out and turn brown.Fix: Increase humidity using the methods mentioned earlier (humidifier, tray of water, grouping plants). Trim off the brown tips with clean scissors (cut at an angle to make it look natural)—this won’t hurt the plant and will make it look healthier.Cause 2: Over-fertilization. Too much fertilizer burns the roots, which causes brown leaf tips.Fix: Stop fertilizing for 4–6 weeks. If the problem persists, flush the soil with water (water thoroughly until water drains out of the bottom) to remove excess fertilizer. Dilute fertilizer to half strength when you resume feeding.Cause 3: Tap water with chemicals. Tap water often contains chlorine, fluoride, or salts, which can build up in the soil and cause brown leaf tips (especially in sensitive varieties like Snow Queen).Fix: Use filtered water, distilled water, or let tap water sit out overnight (this allows chlorine to evaporate) before watering. Every 2–3 months, flush the soil with water to remove chemical buildup.Problem 3: Leggy Growth (Long Stems, Few Leaves)Leggy growth—long, thin stems with large gaps between leaves—is a sign your Epipremnum aureum isn’t getting enough light. When Epipremnum aureum doesn’t get enough light, it stretches toward the nearest light source, resulting in leggy growth.Fix: Move the plant to a spot with brighter, indirect light. This will encourage new growth and make the plant bushier. You can also prune the leggy stems to promote bushier growth—trim the stems just above a leaf node (the small bump where a leaf grows from the stem). The plant will grow new branches from the node, making it fuller. You can even use the pruned stems to propagate new plants (more on that later!)Problem 4: Wilting Leaves (Even After Watering)If your Epipremnum aureum is wilting even after you’ve watered it, there are two likely causes: root rot or underwatering (yes, underwatering can cause wilting too!)Cause 1: Root rot (overwatering). If the soil is moist but the plant is wilting, root rot is the culprit. The rotted roots can’t absorb water, so the plant wilts even though the soil is wet.Fix: Follow the root rot fix from Problem 1—trim rotted roots, repot in fresh soil, and water sparingly.Cause 2: Underwatering (severe). If the soil is bone dry and the leaves are wilted, the plant is severely dehydrated. Even after watering, it may take a few hours for the leaves to perk up.Fix: Water thoroughly twice (as mentioned earlier) to ensure the soil absorbs moisture. Check the soil more frequently to avoid underwatering again.Problem 5: Pests (Mealybugs, Spider Mites, Aphids)Epipremnum aureum is relatively pest-resistant, but it can still get infested with common houseplant pests, especially if it’s stressed (from low light, overwatering, or poor air circulation).Common pests to watch for:- Mealybugs: Small, white, fuzzy bugs that cluster on the undersides of leaves and along stems. They suck sap from the plant, causing yellow leaves and sticky residue (honeydew).- Spider mites: Tiny, red or brown bugs that spin fine webs on the leaves. They cause yellow spots and dry, crispy leaves.- Aphids: Small, green or black bugs that cluster on new growth. They also suck sap, causing distorted leaves.Fix: For small infestations, wipe the leaves with a damp cloth or a cotton swab dipped in rubbing alcohol (this kills the pests on contact). For larger infestations, use an insecticidal soap or neem oil (follow the instructions on the bottle). Repeat the treatment every 7–10 days until the pests are gone. Also, isolate the infested plant from other plants to prevent the pests from spreading.Part 4: Advanced Tips for Thriving Epipremnum aureum (Propagation, Pruning, Repotting)Once you’ve mastered the basics and fixed any common problems, you can take your Epipremnum aureum care to the next level with these advanced tips. These will help your Epipremnum aureum grow faster, fuller, and even multiply—so you can share your greenery with friends!1. Propagation: Grow New Epipremnum aureum for FreeEpipremnum aureum is one of the easiest plants to propagate, and it’s a fun way to expand your plant collection (or give plants as gifts). The best part? You can propagate it in water or soil—both methods work well for beginners.Propagation in water (simplest method):1. Take a healthy stem cutting from your Epipremnum aureum—look for a stem that’s 4–6 inches long with at least 2–3 leaf nodes (the bumps where leaves grow). Use clean, sharp scissors or pruning shears to cut the stem just below a leaf node.2. Remove the leaves from the bottom 1–2 nodes (this is where the roots will grow—leaves in the water will rot).3. Place the cutting in a glass or jar of water, making sure the nodes are submerged (the leaves should be above the water).4. Place the jar in a spot with bright, indirect light. Change the water every 3–5 days to keep it clean and prevent bacterial growth.5. After 2–4 weeks, you’ll see small white roots growing from the nodes. Once the roots are 1–2 inches long, you can transplant the cutting into soil (or keep it in water permanently—Epipremnum aureum grows well in water too!).Propagation in soil:1. Follow steps 1–2 above (take a stem cutting and remove bottom leaves).2. Dip the cut end of the stem in rooting hormone (optional, but it helps speed up root growth).3. Plant the cutting in a small pot with well-draining soil. Water thoroughly and place in bright, indirect light.4. Keep the soil slightly moist (but not wet) until roots form (about 3–4 weeks). You can check for roots by gently tugging on the cutting—if you feel resistance, roots have grown!2. Pruning: Keep Your Epipremnum aureum Bushy & TidyPruning is essential for keeping your Epipremnum aureum bushy and preventing leggy growth. It also encourages new growth and removes dead or damaged leaves. Here’s how to prune:- Use clean, sharp scissors or pruning shears.- Trim stems just above a leaf node (this is where new growth will sprout).- Focus on pruning leggy stems, dead or yellow leaves, and stems that are growing too long.- Prune in the spring or summer (growing season) for best results—avoid pruning in fall/winter when growth is slow.Don’t be afraid to prune! Epipremnum aureum is resilient and will bounce back quickly with new growth. You can even prune up to 1/3 of the plant at once if it’s very leggy.3. Repotting: Give Your Epipremnum aureum Room to GrowEpipremnum aureum grows quickly, and eventually, it will outgrow its pot. Repotting gives the roots more room to grow and prevents root bound (when roots wrap around the pot, preventing water and nutrient absorption). Here’s how to repot:When to repot: Repot every 1–2 years, or when you see roots growing out of the drainage holes, or the plant is growing slower than usual.How to repot:1. Choose a pot that’s 1–2 inches larger than the current pot (too big of a pot will hold too much water, leading to root rot).2. Fill the bottom of the new pot with a layer of well-draining soil.3. Gently remove the Epipremnum aureum from its current pot—tap the sides of the pot to loosen the soil, then pull the plant out by the base (be careful not to damage the roots).4. Loosen the root ball slightly (if it’s root bound) to encourage new root growth.5. Place the plant in the new pot, add soil around the sides, and press down gently to secure it. Water thoroughly and place in bright, indirect light.Repot in spring or summer (growing season) so the plant can recover quickly.Part 5: Final Tips for New Epipremnum aureum ParentsTo wrap up, here are a few final tips to help you keep your Epipremnum aureum thriving for years to come:1. Be patient: Plants grow slowly, so don’t expect immediate results. It may take a few weeks for your Epipremnum aureum to recover from problems or show new growth—trust the process!2. Observe your plant: The best way to care for your Epipremnum aureum is to pay attention to it. Notice how it responds to light, water, and humidity—if the leaves start to yellow or wilt, it’s trying to tell you something.3. Don’t overcomplicate it: Epipremnum aureum is a simple plant—you don’t need fancy tools or expensive fertilizers. Stick to the basics (bright indirect light, well-draining soil, water when dry) and you’ll be fine.4. Have fun: Plant parenting is supposed to be enjoyable, not stressful. If you make a mistake (and you will!), don’t worry—Epipremnum aureum is forgiving, and you can always fix it. Celebrate small wins, like new leaves or successful propagation!The Epipremnum aureum is more than just a plant—it’s a perfect companion for new plant parents, a beautiful addition to any home, and a reminder that gardening doesn’t have to be complicated. With the tips in this guide, you now have everything you need to troubleshoot common problems, master the basics of care, and even grow more Epipremnum aureum plants for free. Remember: every plant parent starts somewhere, and the most important thing is to learn from your mistakes and enjoy the journey.So go ahead—bring home a Epipremnum aureum, give it a little love, and watch it thrive. Before you know it, you’ll be a confident plant parent with a lush, trailing Epipremnum aureum that’s the envy of all your friends!
-
-
March 23,2026
-
Why Your Lilium Leaves Turn Yellow & Droop: Common Mistakes & Fixes
-
Lilium, commonly known as lilies, are beloved flowering bulbs cherished for their elegant blooms, vibrant hues, and delicate fragrance. Whether planted in outdoor garden beds, patio containers, or indoor pots, these perennial flowers add a touch of timeless beauty to any space. But for countless gardeners worldwide—from beginners to seasoned plant lovers—one frustrating issue keeps popping up: yellowing, drooping leaves that ruin the plant’s appearance and often signal underlying distress.If your lilium leaves are turning pale yellow, wilting downward, feeling soft or brittle, or dropping off prematurely, you’re not alone. Many growers assume this means their lily is dying, but more often than not, it’s simply a sign of incorrect care—small, fixable mistakes that disrupt the plant’s health. 1. First: Understand Why Lilium Leaves Yellow & DroopBefore jumping into fixes, it’s critical to know why lilies react this way. Lilium are resilient bulbs, but they’re sensitive to environmental changes and improper care. Yellowing and drooping are the plant’s way of “sounding the alarm”—it’s struggling to absorb nutrients, water, or light, or its roots/ bulb are under stress.Healthy lily leaves are firm, upright, and rich green (some varieties have subtle variegation). When this changes, the problem falls into 5 core categories: watering errors, light stress, soil & nutrient issues, temperature & humidity shock, pest/disease damage. We’ll break down each cause with clear signs, so you can diagnose your lily’s issue in minutes.2. The #1 Culprit: Watering Mistakes (Overwatering & Underwatering)Nearly 70% of lilium yellowing and drooping is caused by wrong watering habits. Lilies have a delicate water balance—their bulbs rot easily in soggy soil, but they wilt quickly in dry conditions. Let’s distinguish between the two and fix them fast.2.1 Overwatering: The Silent Killer of LiliumSigns of overwatering: Leaves turn soft yellow (starting from lower leaves), stems droop limply, soil stays wet for days, bulb/roots feel mushy or smell rotten, mold grows on the soil surface.Lilium bulbs are storage organs, designed to hold moisture. When soil is constantly waterlogged, oxygen can’t reach the roots, causing root rot and bulb rot. The plant can’t absorb nutrients, so leaves yellow and droop as the roots die.Emergency Fix: Stop watering immediately. Move the pot to a well-ventilated area, remove excess water from the saucer. If rot is severe, dig up the bulb, trim mushy roots/leaves with sterile scissors, dust with fungicide, and repot in fresh, dry soil.2.2 Underwatering: Quick to Fix, Easy to MissSigns of underwatering: Leaves turn crispy yellow (edges first), droop stiffly, soil is bone dry and pulls away from the pot, flowers wilt quickly.Lilies need consistent moisture during their growing and blooming season (spring to summer). Dry soil means the roots can’t take up water, so the plant sacrifices leaves to conserve energy.Emergency Fix: Water slowly and deeply until water drains from the bottom. Mist the leaves lightly to boost humidity. For outdoor lilies, add a 2-inch layer of mulch to lock in soil moisture.Pro Watering Rule for LiliumWater only when the top 2-3 inches of soil are dry. Use well-draining pots with drainage holes, and never let lilies sit in standing water. Reduce watering drastically after blooming, when the plant goes dormant.3. Light Stress: Too Much Sun or Too Little ShadeLilium are sun-loving plants, but they’re prone to stress from extreme light conditions—another top reason for yellow, drooping leaves.3.1 Too Much Direct Sun (Sunburn)Signs: Leaves develop yellow/brown scorched patches, droop during the hottest part of the day, especially on the side facing the sun.Intense midday sun (especially in summer) scorches lily leaves, damaging their cells and causing wilting. This is common for potted lilies placed on unshaded patios or outdoor lilies in open, exposed beds.Fix: Move potted lilies to a spot with morning sun + afternoon shade. For outdoor garden lilies, plant near tall shrubs or add a shade cloth during peak sun hours.3.2 Too Little Light (Leggy, Weak Growth)Signs: Leaves turn pale yellow, stems stretch and droop, the plant looks “leggy,” and it fails to bloom.Without enough light (less than 6 hours of bright, indirect light daily), lilies can’t photosynthesize properly. They produce weak, sparse foliage that can’t support itself, leading to drooping and yellowing.Fix: Move the plant to a brighter location (south-facing windows indoors, full sun spots outdoors). Avoid dark corners or dense shade.4. Soil & Nutrient Deficiencies: Starving or Overfeeding Your LilyLilies need nutrient-rich, well-draining soil to thrive. Poor soil quality or wrong fertilization will quickly lead to yellow, drooping leaves.4.1 Poor Soil Drainage & CompactionSigns: Water pools on the soil surface, roots suffocate, leaves yellow and droop (similar to overwatering).Lilium bulbs hate heavy, clay soil or compacted potting mix. This traps water and starves roots of oxygen, leading to rot and stress.Fix: Repot in a well-draining mix (equal parts potting soil, perlite, and peat moss/coconut coir). For outdoor beds, amend soil with sand or compost to improve drainage.4.2 Nutrient Deficiencies (Nitrogen, Iron, Magnesium)Signs: Uniform yellowing (nitrogen deficiency), yellow leaves with green veins (iron deficiency), yellow edges on mature leaves (magnesium deficiency).Lilies need balanced nutrients during growth: nitrogen for foliage, phosphorus for blooms, potassium for roots. A lack of key minerals causes chlorosis (yellowing) and weak growth.4.3 Overfertilization (Burned Roots)Signs: Leaf tips turn brown/yellow, droop sharply, soil has a white crust (salt buildup).Too much fertilizer, especially high-nitrogen mixes, burns lily roots and disrupts water absorption.Fix: Flush soil with water to remove excess salts. Use a balanced, slow-release bulb fertilizer once in early spring, and stop fertilizing after blooming.5. Temperature & Humidity Shock: Sudden Changes Stress LiliumLilies prefer stable, mild conditions. Extreme temperatures or sudden shifts will cause leaves to yellow and droop rapidly.5.1 Extreme Heat & ColdSigns: Leaves droop and yellow in temperatures above 30°C (86°F) or below 10°C (50°F). Cold drafts (near AC, windows, or doors) also trigger stress.Fix: Keep lilies in 18-24°C (65-75°F) during growth. Protect outdoor lilies from frost with mulch, and move potted lilies indoors during heatwaves or cold snaps.5.2 Low HumiditySigns: Leaf edges yellow and crisp, droop slightly, especially in indoor heated/air-conditioned spaces.Lilies prefer moderate humidity (40-60%). Dry air pulls moisture from leaves, causing dehydration.Fix: Mist leaves 2-3 times a week, place a tray of water near the plant, or group with other houseplants to boost humidity.6. Pests & Diseases: Hidden Invaders Damaging Your LilyIf care habits are correct, pests or diseases are likely causing yellowing and drooping. These tiny threats attack leaves, roots, and bulbs, weakening the plant.6.1 Common Pests- Aphids & Spider Mites: Suck sap from leaves, causing yellow spots and drooping. Look for tiny bugs or webbing on leaf undersides.- Fungus Gnats: Larvae damage roots, leading to water and nutrient absorption issues.Fix: Wipe leaves with neem oil or insecticidal soap. For gnats, let soil dry between waterings and use sticky traps.6.2 Common Diseases- Root Rot/Bulb Rot: Fungal disease from soggy soil, causing mushy roots and yellow drooping leaves.- Fungal Leaf Spot: Yellow/brown spots that spread, leading to leaf drop.Fix: Remove infected leaves, treat with fungicide, improve air circulation, and avoid wetting leaves when watering.7. Step-by-Step Emergency Rescue: Save Your Yellow-Drooping Lilium FastFollow this 5-minute rescue plan to revive your stressed lily immediately:1. Check the soil: Wet = stop watering & ventilate; Dry = water deeply.2. Adjust light: Move to bright, indirect sun (no midday scorch).3. Trim damage: Cut fully yellow/brown leaves with clean scissors to redirect energy.4. Boost humidity: Mist leaves or add a humidity tray.5. Inspect for pests: Wipe leaves and treat with neem oil if bugs are present.Most lilies recover within 3-7 days with these fixes, growing new green leaves and regaining upright growth.8. Long-Term Care: Prevent Yellowing & Drooping ForeverOnce your lily is revived, follow these golden rules to keep it healthy:- Plant correctly: Bury bulbs 2-3 times their height deep, in well-draining soil.- Water smart: Dry topsoil = water deeply; no standing water.- Light right: 6+ hours of morning sun, afternoon shade.- Fertilize lightly: Once yearly with bulb fertilizer, no overfeeding.- Prune properly: Remove dead leaves, but don’t cut green foliage (it feeds the bulb).- Dormancy care: After blooming, let leaves die back naturally, reduce watering, and store bulbs in a cool, dry spot.Don’t Give Up on Your LiliumYellowing and drooping leaves don’t mean your lilium is beyond saving—it’s simply a sign you’ve been caring for it wrong, not badly. By fixing watering, light, soil, or nutrient issues, you can revive your lily quickly and enjoy its stunning blooms year after year.Lilies are rewarding plants that thrive with consistent, gentle care. Remember: stable conditions > perfect conditions. With these tips, your lilium will stay lush, green, and upright, blooming beautifully for seasons to come.
-
-
February 27,2026
-
Identification, Harm, and Control of Solanum ptychanthum!
-
In North American cornfields, soybean fields, vegetable growing areas, and even urban vacant lots and roadside thickets, you may have already seen an inconspicuous yet persistent wild plant—Solanum ptychanthum. Often called the Eastern Black Nightshade, it is an annual broadleaf weed widely distributed in the United States and Canada. Because of its resemblance to edible berry plants, many people misjudge its safety; in agricultural production, it is one of the most troublesome competing weeds for growers.I. Basic Plant Overview*Solanum ptychanthum* belongs to the genus *Solanum* within the family Solanaceae, the same family as *Solanum lycopersicum* and *Solanum tuberosum*, but is a wild species. It is native to North America and widely distributed in the Midwestern and Eastern United States and southern Canada.It is an annual herbaceous plant that completes its germination, flowering, fruiting, and seed maturation process within a single growing season. Due to its strong adaptability and high seed yield, it is often considered a problem weed in agricultural areas.II. Identifying Characteristics of *Solanum ptychanthum*Correct identification is the first step in management. Especially in North America, it is often confused with other nightshade plants, such as *Solanum americanum* or *Solanum nigrum*. The following are key identification points:1. Plant MorphologyTallness generally 30–90 cmStem erect or semi-spreadingNumerous branchesSmooth surface or with a few fine hairsStem color green to purplish-greenIn fertile soil, the plant may be taller and denser.2. Leaf CharacteristicsLeaves alternateOvate or elliptical in shape5–10 cm longMargins slightly wavy or shallowly toothedDark green leaf surface, soft textureCompared to *Solanum nigrum*, its leaf margins have shallower teeth, and the overall outline is smoother.3. Flower CharacteristicsSmall white flowersFive-lobed star-shaped corollaYellow anthers clustered into a conical structureMultiple flowers forming an umbel-like inflorescenceFlowering period is usually from early summer to early autumn. 4. Fruit CharacteristicsThe fruit is a round berry.Initially green, it turns black or purplish-black when ripe. The surface is glossy. The fruit diameter is approximately 6–10 mm. The fruit resembles a small blueberry or wild berry, but it should not be eaten casually.III. Ecological Habits and Dispersal Methods*Solanum ptychanthum* is a typical "disturbance weed," meaning it prefers disturbed environments.1. Growing EnvironmentFarmlandRoadsidesHorticultural plotsConstruction sitesRiverbanks and drainage ditchesIt prefers sunny environments, is not particular about soil type, and tolerates mild drought.2. Reproductive CapacityPrimarily reproduces through seedsA single plant can produce hundreds to thousands of seedsSeeds can survive in the soil for many years.Dispersal methods include:Carried by agricultural machineryDispersed by birds after feedingDispersed by water currentsMixed with crop seedsIts strong seed bank allows it to repeatedly appear in crop rotation systems.IV. Agricultural Hazard AnalysisIn US and Canadian agricultural systems, *Solanum ptychanthum* is considered a highly competitive broadleaf weed.1. Competition for Resources with CropsIt competes with the following crops:CornSoybeansWheatTomatoesPotatoesCompeting for:Soil nutrientsWaterLightGrowing spaceIf not controlled in the early stages, it can significantly impact crop yield.2. Host Role for Pests and DiseasesAs a member of the Solanaceae family, it can serve as an intermediate host for various pathogens and pests, including:certain fungal diseasesVirus vectorsAphids and other pestsThis increases the indirect risk to cash crops.3. Harvest DisturbanceMature plants may lodging, affecting the efficiency of mechanical harvesting and potentially contaminating produce.V. Public Health and Toxicity Risks Solanum ptychanthum contains alkaloids (such as glycoalkaloids), especially in unripe fruit.Possible symptoms include:NauseaVomitingAbdominal painDiarrheaHigh risk of ingestion by children and pets. Special attention should be paid to weed control in residential areas and parks.It is important to emphasize that the toxicity of ripe fruit decreases, but consumption is still not recommended unless professionally confirmed.VI. Integrated Weed ManagementIn international agricultural environments, Integrated Weed Management (IWM) strategies are recommended.(I) Cultural ControlCrop rotationReduces its dominance in continuous Solanaceae crops.Dense planting and mulchEnhances crop community competitiveness.Cover cropsSuch as rye or clover, inhibiting germination.(II) Mechanical ControlEarly tillageIntertillage and weedingManual weeding (home gardens)Key point: Removal before flowering and seed setting.(III) Chemical ControlSelective herbicides can be used in large-scale planting areas:Best results during seedling stageCombined with resistance management strategiesRotational mechanism of actionMust follow local agricultural department or EPA-approved guidelines.(IV) Preventive MeasuresClean farm equipmentMonitor field edgesPrevent seed dispersalEarly detection and early control are core principles.VII. Distinguishing it from other nocturnal shade plantsAccurate differentiation is crucial in the international agricultural context.Key distinguishing features include:Inflorescence morphologyFruit sizeLeaf margin structureDegree of drooping of mature fruitIn professional agricultural management, confirmation through plant identification manuals or agricultural extension agencies is recommended.VIII. Management Recommendations and Future TrendsWith global climate change and adjustments in agricultural practices, adaptive weeds like *Solanum ptychanthum* may expand their distribution range.Recommendations:Strengthen field monitoringAdopt multimodal control methodsAvoid reliance solely on chemical herbicidesEstablish a long-term seed bank management strategyIntegrated management can not only reduce costs but also mitigate resistance issues.Although *Solanum ptychanthum* appears unassuming, it plays a complex role in agricultural production and ecological management. For overseas farmers and horticulturalists, understanding its identification characteristics and damage mechanisms is a crucial step towards achieving sustainable agricultural management.Through scientific identification, systematic control, and long-term management, we can effectively limit its impact to acceptable levels. In today's ever-changing global agricultural environment, proactive awareness and precise management are the best strategies for dealing with problem weeds.
Show More
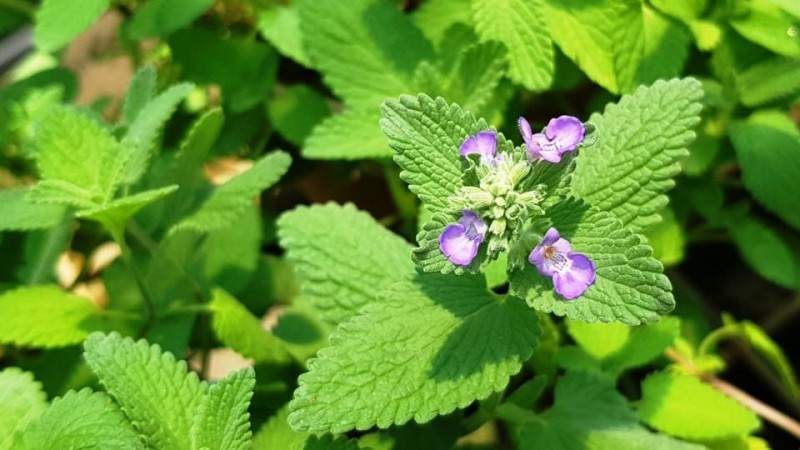
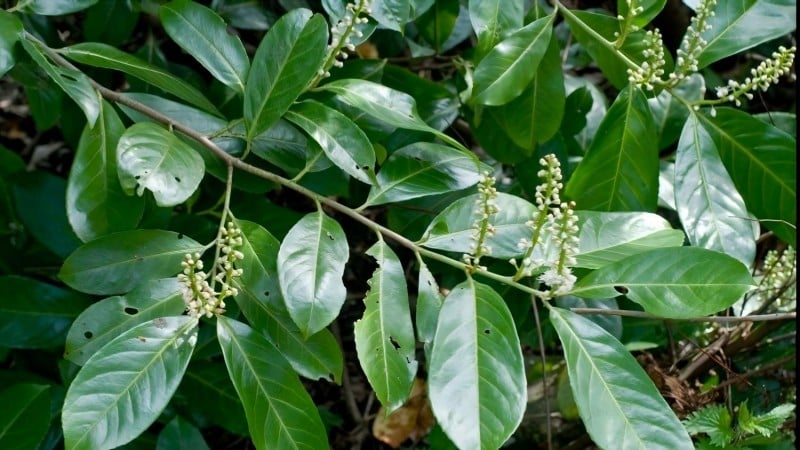


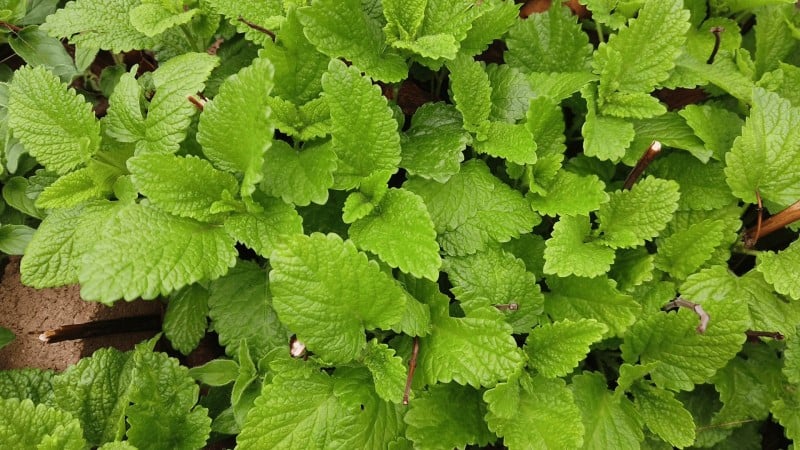


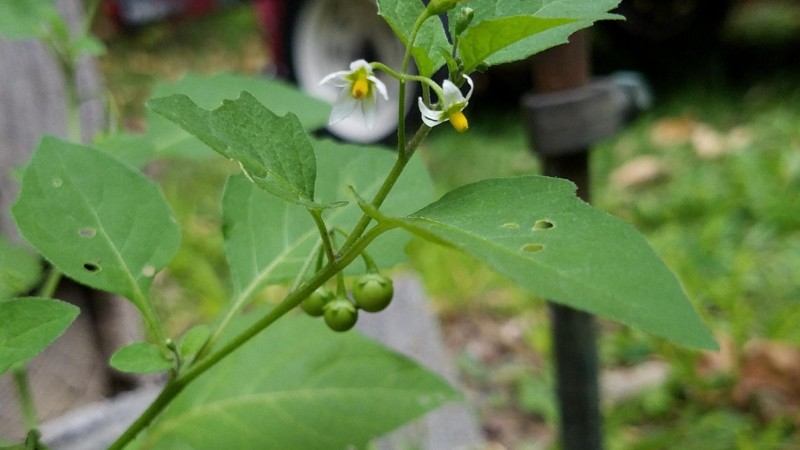
 Poisonous and danger
 Wild and common weed
 Edible and medicinal